Airtable Views Guide 2026: Grid, Gallery, Kanban, Gantt, Calendar & Form Views Explained

Picture this: Your team is drowning in a sea of tasks, deadlines, and scattered spreadsheets, where simply finding the right information is a daily hurdle. Enter Airtable’s views, a versatile toolbox for organizing chaos with a visual kick—if wielded correctly. Grid View might feel comfortingly familiar, akin to the well-worn spreadsheet, but it’s the Gantt and Kanban views where Airtable truly shines. These views transform convoluted project timelines into intuitive visual maps, making dependencies and bottlenecks pop out immediately. Yet, the catch is the Gantt View remains locked away unless you’re on a Team Plan or higher, forcing budget-conscious teams to think twice before upgrading.
Introduction to Airtable Views
Airtable views are more than just a way to look at data; they are tailored lenses through which you can manage workflows, collaborate with teams, and visualize complex information sets effectively. At its core, Airtable offers seven distinct views, each designed to cater to different organizational needs: Grid, Gallery, Kanban, Gantt, Calendar, Timeline, and Form views.
To get started with views, it’s crucial to understand their role in your workflow. For instance, the Grid view is your go-to for data entry, akin to a spreadsheet but with Airtable’s relational capabilities. On the other hand, the Kanban view is perfect for agile project management. If you’re managing event planning or resource allocation, Gantt and Calendar views will be invaluable, but remember, they are only accessible on the Team plan or higher.
Creating a new view in Airtable is straightforward but requires precision. Follow these steps to set it up correctly:
- Open the base — Navigate to the specific base you want to modify.
- Click the “Views” sidebar — This sidebar is your gateway to managing how data is presented.
- Click “+ Create new view” — Initiates the view creation process.
- Select the desired view type — Choose a view based on your current needs (e.g., Grid, Kanban).
However, a common pitfall is not accounting for view-specific filters and field visibility. Each view can have distinct filters, which do not sync across views. This can lead to discrepancies if not monitored closely. Additionally, hiding a field in one view does not affect its presence in others, which can impact formulas and linked data. Recognizing these nuances will ensure you harness Airtable views to their fullest potential. For more detailed guidance, consider consulting Airtable’s official documentation.
Understanding Grid View
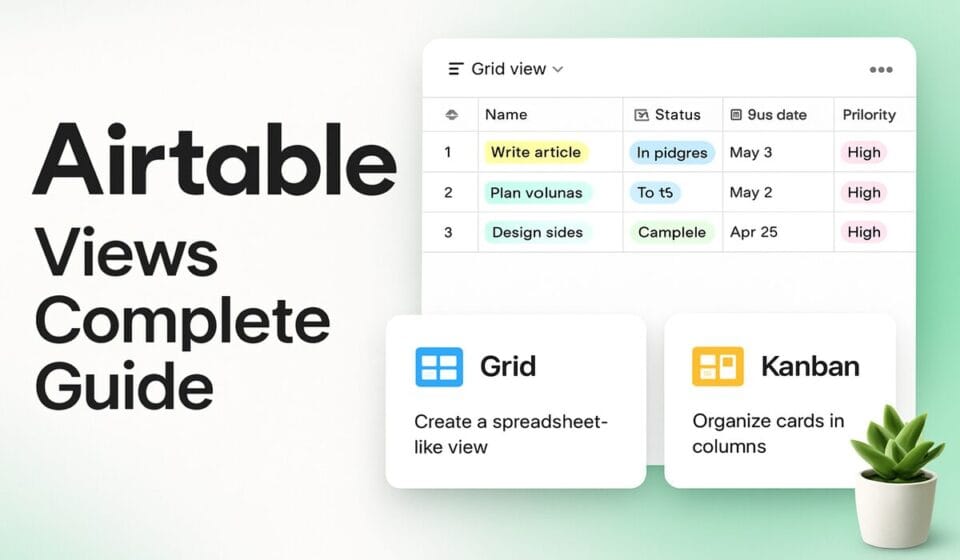
Grid View in Airtable is the backbone of your data management, offering a familiar spreadsheet-like interface. It’s the first stop for data entry, organization, and quick lookup, acting as the primary workspace in any Airtable base. While its similarities to Excel might attract users seeking a smooth transition, its real strength lies in blending Airtable’s relational database capabilities with visual flexibility.
- Accessing Grid View — Open your base, and you’ll automatically be in Grid View. To switch between different grid views, use the “Views” sidebar and select your preferred grid configuration.
- Customizing Columns — Right-click a column header to rename, delete, or change the field type. The field types range from text and numbers to more complex options like links and attachments.
It’s important to understand that filters and hidden fields in Grid View don’t alter the data itself but merely how it’s displayed. This means you can customize views for different departments without affecting the underlying database structure. However, be cautious with field visibility. Hiding a field doesn’t exclude it from calculations or linked views, which can lead to unexpected results if not managed properly.
For teams on the Free Plan, note the 1,000 record limit per base. If your operations exceed this, consider the Team Plan for a 50,000 record limit, which is a significant upgrade but comes at a cost of $20 per user/month. The Grid View’s simplicity is its competitive edge, but remember that without access to advanced features like extensions on the Free Plan, you might hit operational bottlenecks. Consider upgrading if you need integrations with other tools or enhanced automation.
For detailed instructions on configuring views, visit the official Airtable documentation.
Exploring Gallery and Kanban Views
Gallery and Kanban views offer distinct advantages for visual project management, but their effectiveness hinges on understanding their specific use cases and potential pitfalls.
Gallery View shines in contexts where visual elements are paramount. Teams in design, marketing, or content creation often need to focus on images or documents. This view showcases records as large, visually appealing cards, prioritizing attachments. However, beware of attachment limits: on a Free Plan, you only get 1 GB per base, which can quickly be consumed by high-resolution files. For teams requiring robust visual management, upgrading to the Team Plan provides a more generous 20 GB per base, which is often necessary to avoid constant storage issues.
Kanban View is indispensable for process-oriented workflows where items move between stages — think software development sprints or sales pipelines. It organizes records into stacks based on a single select field. However, it’s not without quirks. One common oversight is neglecting the need for consistent field values; ensure your single select field options are well-defined before setting up a Kanban board. Otherwise, you risk cluttered and disorganized stacks.
To create these views:
- Views Sidebar — Click “+ Create new view”.
- Select View Type — Choose either “Gallery” or “Kanban”.
- Configure Options — For Kanban, ensure your single select field is set up to represent the stages of your workflow.
Remember, both views can be customized with filters and hidden fields, but these settings are view-specific. Ensure consistency across views to maintain data integrity. For details on setting up and optimizing these views, refer to Airtable’s official documentation.
Mastering Calendar and Timeline Views
Calendar and Timeline views in Airtable are indispensable for teams dealing with time-sensitive projects, but knowing when and how to leverage each is crucial. The Calendar View is available on all plans and is perfect for visualizing records with date fields. If your primary need is to track deadlines or schedule events, use the Calendar View. Start by ensuring your records have date fields, then:
- Open the base — Navigate to the “Views” sidebar.
- Click “+ Create new view” — Select “Calendar.”
- Configure — Choose the date field to display events.
The Calendar View does not support time-blocking or resource allocation, a limitation that makes the Timeline View more suitable for these tasks. However, Timeline is only accessible on the Team plan and above, necessitating an upgrade if your workflow requires it. When using Timeline View, you can better manage resources and dependencies, especially in complex projects.
- Open the base — Use the “Views” sidebar.
- Click “+ Create new view” — Choose “Timeline.”
- Set up — Define the time range and fields for resource allocation.
One common pitfall in both views is overlooking view-specific filters, which can cause data discrepancies if not set consistently across views. Always double-check filters to ensure data integrity. Remember, while Calendar View offers a straightforward scheduling tool, Timeline View provides a more robust solution for detailed project planning. If you’re hitting record or storage limits, consider revisiting your plan or pruning unnecessary data. For more detailed guidance, refer to the official Airtable documentation.
Utilizing Gantt View for Project Management
The Gantt View is indispensable for project managers who need a clear visualization of timelines and dependencies. It’s available starting on the Team Plan, meaning you must budget at least $20 per user/month annually. Here’s how to leverage it effectively:
- Enable Gantt View — Navigate to your base and click the “Views” sidebar. Choose “+ Create new view” and select “Gantt”. This view requires date fields to map tasks over time, so ensure your table is set up accordingly.
- Set Dependencies — Gantt shines with dependencies. Use the “Predecessor” field type to define task order. When tasks overlap or require sequential completion, this feature highlights potential bottlenecks. Keep an eye on critical paths to prevent delays.
- Adjust Timelines — Simply drag task bars to adjust timelines. This immediately updates dependent tasks, offering real-time feedback on schedule shifts. Be cautious: without proper permissions, collaborators might inadvertently alter timelines. Use locked views to safeguard this.
- Monitor Progress — Regularly check the Gantt chart to ensure tasks are on track. Use color coding to differentiate task statuses (e.g., complete, in progress, pending). This visual cue aids in quickly assessing project health.
- Export and Share — For stakeholders not on Airtable, export the Gantt chart. This is crucial for keeping everyone aligned without requiring additional licenses. However, exported charts are static, so schedule regular updates.
Avoid using Gantt for small projects where timelines are straightforward; the setup might outweigh the benefits. Also, be aware of the learning curve for new users—training sessions can mitigate this. For more details on setup, consult Airtable’s documentation.
Creating and Using Form Views
Form Views in Airtable allow you to collect and populate data directly into your base with ease. As a consultant implementing Airtable in various operational scenarios, I’ve found Form Views to be indispensable for teams needing streamlined data entry from external sources or non-technical users. However, it’s crucial to understand their setup nuances and limitations.
To create a Form View, follow these steps:
- Views Sidebar — Navigate to your base and click the “Views” sidebar.
- Create New View — Click “+ Create new view” and select “Form” from the list.
- Customize Form — Add fields to your form by dragging them from the left panel. You can rearrange them to suit your data collection needs.
- Share Form — Click the “Share form” button to generate a URL that can be distributed to respondents. Options to embed the form on a website are also available.
A critical aspect often overlooked is the necessity of field configuration. Ensure mandatory fields in your database are marked as required in the form to prevent incomplete data submissions. Also, remember that while the form interface is public, submissions respect field permissions set in your base — a key security feature.
One limitation to note is that Form Views don’t natively support file attachments from respondents unless you’re on a plan that allows higher attachment storage. For teams on the Free Plan, this means you should carefully monitor your 1 GB limit to avoid disruptions.
It’s also worth mentioning that Form Views are counted towards the total view limit per table, impacting your overall view strategy. Maintain a balance between active and archived views to optimize performance.
For more detailed steps and customization tips, refer to the official Airtable documentation.
Feature Limits and Accessibility
Understanding the feature limits and accessibility options in Airtable is crucial for optimizing its use across different plan tiers. Each plan has distinct constraints, affecting how teams can manage their workflows. For instance, the Free Plan restricts you to 1,000 records per base and lacks advanced views like Gantt and Timeline. This makes it unsuitable for large projects or teams needing intricate project management tools.
To manage these constraints effectively, consider the following strategies:
- Monitor Record Usage — Regularly check the number of records to avoid hitting limits. If you approach the cap, archive or delete unnecessary records to maintain operational efficiency. Use the “Records” sidebar to track your current count.
- Storage Management — Keep an eye on attachment storage, especially on lower-tier plans. Remove outdated files to free up space or upgrade if you consistently max out storage.
- Utilize Filters Wisely — Each view can have its own filters, which don’t affect other views. Ensure that filters are correctly set up in each view to avoid discrepancies in data presentation. Misconfigured filters can lead to misunderstandings about data availability.
- Understand View-Specific Permissions — Use personal views for individual setups, but remember they count towards the total view limit. Only the creator can edit these views, which can streamline workflows but may limit team collaboration.
For teams on the Team Plan or higher, take advantage of advanced features like extensions and automations to enhance productivity. However, be mindful of automation run limits, which can halt operations if exceeded. Always monitor automation usage, and if necessary, upgrade to accommodate higher volumes of automated tasks. For more in-depth guidance, refer to Airtable’s support documentation.
Pricing Plan Comparison
| Plan | Cost (Annual/Monthly) | Records per Base | Key Features |
|---|---|---|---|
| Free | $0 | 1,000 | Basic views, limited storage, no Gantt |
| Team | $20/$24 per user | 50,000 | Gantt view, extensions, advanced automations |
| Business | $45/$54 per user | 125,000 | Two-way sync, SAML SSO, admin panel |
| Enterprise Scale | Custom | 500,000+ | All features, enterprise-level capabilities |
The Free plan is perfect for small teams or personal projects with basic data needs, but its limitations on record count and lack of advanced views like Gantt can quickly become bottlenecks. For mid-sized teams aiming to leverage Gantt charts and automations, the Team plan strikes a balance between cost and functionality, but watch the attachment storage limits carefully. The Business plan adds essential enterprise features like SAML SSO and a robust admin panel, making it suitable for larger organizations needing tighter security and management controls. For massive datasets and extensive automation, the Enterprise Scale plan provides the necessary flexibility and capacity, though pricing here is negotiable based on specific needs. For further details, check the official Airtable plans page.
Best Practices and Common Issues
When implementing Airtable views, understanding their nuances can significantly enhance efficiency. One often-overlooked aspect is the isolation of view-specific filters. Each view operates independently, meaning filters don’t carry over. This can lead to discrepancies if not meticulously configured. Always double-check filters in each view to ensure data consistency across your workflows.
Another practical tip involves managing field visibility. Hiding fields in a view doesn’t delete them; they remain active in backend processes like formulas and linked records. Therefore, be cautious when hiding fields, as it could impact calculations or data relationships unknowingly.
A recurring issue arises with record and storage limits. Free users often hit the 1,000-record ceiling, halting data entry. If you’re nearing this limit, consider archiving old records or upgrading to a Team Plan. For attachment-heavy projects, the 1 GB storage limit on the Free Plan can be restrictive. Regularly audit your attachments and remove unnecessary files to free up space or upgrade your plan to accommodate more data.
Personal views, while beneficial for individual customization, are not without limits. They count toward your total view cap per table, which can become problematic in a collaborative environment with extensive view usage. Plan your view allocations strategically to avoid hitting these thresholds unexpectedly.
Finally, locked views, which require creator or owner permissions to modify, are essential for maintaining view integrity in team settings. Use them to prevent accidental changes that can disrupt workflow continuity.
By addressing these common issues proactively and employing best practices, teams can leverage Airtable’s views more effectively and avoid common pitfalls. For more on view management, consult the Airtable Views Overview.
Frequently Asked Questions
How do I switch between different views in Airtable?
To switch views, click on the view switcher near the top-left corner of your base. You’ll see options like Grid, Kanban, Calendar, etc. Note that Gantt and Timeline views are only accessible on Team plans and above. Familiarize yourself with the UI to efficiently manage your data.
What are the limitations of Airtable’s Free Plan?
The Free Plan restricts you to 1,000 records per base and 1 GB of attachment storage. You won’t have access to Gantt and Timeline views or advanced automations. It’s suitable for small-scale projects or personal use, but teams will quickly hit these limits.
Can I customize the fields displayed in each view?
Yes, Airtable allows you to customize fields for each view. In Grid View, click the “Hide fields” button to select which fields to display. For other views, look for similar options in the view’s settings panel. Tailoring fields per view optimizes data visibility and relevance.
How does Airtable’s Kanban view help in workflow management?
Kanban view organizes records into stacks based on a single select field, allowing you to visualize workflows like task progress. It’s effective for teams managing projects with distinct stages. However, it’s less suited for projects requiring detailed timeline tracking—consider Gantt View for that.
Are there any hidden costs associated with Airtable plans?
While Airtable’s pricing is transparent, be aware that advanced features like Gantt and Timeline views are only available on higher-tier plans. Additionally, monthly billing is more expensive than annual billing. Review your needs and plan accordingly to avoid unexpected costs.