
Monday.com is one of the most marketed project management platforms on the planet. But marketing and reality don’t always match. After extensive hands-on testing and analyzing thousands of real user reviews across G2, Capterra, and Reddit, here’s an honest assessment of what Monday.com actually delivers in 2026, what it falls short on, and exactly which types of organizations will get the most value from it.
Short answer: For cross-functional teams that need fast adoption, beautiful visual workflows, and solid automation without a steep learning curve, Monday.com is genuinely excellent. For teams that need deep project scheduling, advanced resource management, or enterprise-grade compliance, it has real limitations worth knowing before you sign a contract.
Monday.com in 2026 is best for teams of 5–200 who need visual project tracking, no-code automation and strong CRM capabilities. It’s not ideal for pure software development (use Jira for that) or very small teams where the $9+/user/month price doesn’t justify the features.
Monday.com at a Glance (2025)
| Detail | Info |
|---|---|
| Founded | 2014 (rebranded from dapulse 2017) |
| Customers | 225,000+ organizations, 200+ countries |
| G2 Rating | 4.7/5 (12,000+ reviews) |
| Capterra Rating | 4.6/5 (5,000+ reviews) |
| Starting Price | $9/seat/month (3-seat minimum) |
| Free Plan | Yes (2 users max) |
| Best For | Marketing, ops, cross-functional teams |
| Notable Customers | Uber, Hulu, Canva, Universal Music Group |
What Monday.com Actually Does Well
1. The Interface: Actually Enjoyable to Use
This sounds like a minor point until you’ve spent years watching project management tools collect digital dust because teams refuse to use them. Monday.com’s interface is visually polished in a way that genuinely drives adoption. The colorful status columns, drag-and-drop items, and instantly readable boards mean that a new team member can understand the state of a project within 30 seconds of opening it — no training required.
Every item (task, project, client, campaign) lives in a row on a board. Each row has customizable columns: status, assignee, due date, priority, budget, dependency, file attachment, ratings, email, phone — whatever your workflow needs. You build your own data model without writing a single formula. The board view makes it feel effortless; the underlying structure makes it powerful.
2. Multiple Views: One Dataset, Many Perspectives
Monday.com offers over 10 ways to visualize the same data. Switch between views without reformatting anything:
- Board View: Kanban-style columns. Perfect for sprint management, sales pipelines, and editorial workflows.
- Table View: Spreadsheet-style grid. Great for data entry, bulk editing, and users who think in rows and columns.
- Timeline View: Gantt-style bar chart. Shows project schedules and dependencies across time. Available from the Standard plan.
- Calendar View: Monthly/weekly calendar showing items by due date. Excellent for editorial calendars and event planning.
- Chart View: Auto-generates bar, pie, and line charts from your board data. Useful for status breakdowns and resource distribution.
- Workload View: Shows team capacity across a selected time period. Available on the Pro plan and higher — critical for preventing burnout and over-allocation.
- Map View: Plots location-based data on a map. Useful for field sales, event venues, or location-specific projects.
- Files View: Gallery view of all attachments across the board.
The practical impact: a project manager can use Timeline view for planning, the developer can use Board view for their sprint, and the executive can look at Chart view for status — all from the same board, without anyone reformatting data for the other.
3. Automations: Where Monday.com Earns Its Price Tag
Monday.com’s automation builder uses a “When / Then” recipe format that eliminates repetitive manual work without requiring technical skills. Examples of automations real teams use daily:
- When a task status changes to “In Review” → Notify the reviewer and set a due date 2 business days out
- When a new item is created in the Sales Pipeline board → Create a linked item in the Onboarding board
- When a due date arrives and status is not “Done” → Send a reminder to the assignee and their manager
- Every Monday at 9am → Create this week’s tasks from a template
- When a form is submitted → Add a new item to the board, assign to the relevant team member based on the form response
On the Standard plan, you get 250 automation actions/month. The Pro plan includes 25,000 automation actions/month — enough for teams running dozens of concurrent automations. The Enterprise plan offers unlimited automations with additional cross-board and cross-workspace trigger support.
The new AI automation feature (available on Pro and above with the Monday AI add-on) lets you type a plain-English description: “When a new lead is added to the CRM board, send them a welcome email and add them to the onboarding sequence” — and Monday.com builds the automation recipe for you. It’s genuinely impressive for its simplicity.
4. Integrations: 200+ Native Connections
Monday.com integrates natively with Slack, Microsoft Teams, Google Workspace (Drive, Calendar, Gmail), Zoom, Salesforce, HubSpot, Jira, GitHub, GitLab, Twilio, Mailchimp, Stripe, Shopify, DocuSign, and hundreds more. Integration actions count against your monthly automation quota.
The Slack integration deserves special mention: you can create Monday.com tasks directly from Slack messages, receive board update notifications in channels, and update item statuses from within Slack — without ever opening the Monday.com interface. For teams that live in Slack, this removes the biggest friction point of adoption.
5. Monday WorkDocs: Real-Time Collaboration Built In
Monday WorkDocs is a native document editor embedded within the platform. Think Google Docs, but connected directly to your boards: you can embed live board data, charts, and dashboards inside a document. Teams use WorkDocs for project briefs, meeting notes, SOPs, and onboarding guides — keeping everything in one place rather than linking out to Google Drive or Notion.
WorkDocs support real-time multi-user editing, @mentions to loop in teammates, and AI-assisted writing (Monday AI). While it doesn’t fully replace a dedicated document management system, it’s functional enough that many teams stop paying for separate tools.
Monday.com Pricing: The Real Breakdown (Including What They Don’t Advertise)
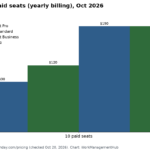
Monday.com has five pricing tiers in 2026. All prices below are annual billing. Monthly billing adds roughly 25-30% to each tier.
Free Plan — $0
Up to 2 users. 3 boards maximum. Unlimited docs. iOS/Android apps. No Timeline, Calendar, or Chart views. No automations or integrations. Useful for evaluating the interface but not realistic for real work.
Basic Plan — $9/seat/month (3-seat minimum = $27/month minimum)
Unlimited boards and items. 5GB file storage. Basic views (Board, Table, Files, Maps). Prioritized customer support. No automations. No integrations. No Timeline view. Honest assessment: most teams quickly outgrow Basic within weeks and need to upgrade to Standard. Don’t let the $9 headline price mislead you about what Basic actually includes.
Standard Plan — $12/seat/month (3-seat minimum)
Everything in Basic plus: Timeline and Gantt view, Calendar view, Guest access (up to 3 guests per paid member), 250 automation actions/month, 250 integration actions/month. This is the most popular plan and the realistic starting point for most small-to-mid-size teams. At $12/seat, a team of 10 pays $120/month or $1,440/year.
Pro Plan — $19/seat/month (3-seat minimum)
Everything in Standard plus: Private boards and workspaces, time tracking, formula columns, dependency columns, Workload view, 25,000 automation actions/month, 25,000 integration actions/month, Chart view. This is the tier where Monday.com’s automation power fully unlocks. For a team of 20, Pro costs $380/month or $4,560/year.
Enterprise Plan — Custom pricing (typically $24-40+/seat/month)
Everything in Pro plus: Advanced reporting and analytics, enterprise-grade permissions (board, row, and column level), multi-level permissions, tailored onboarding, premium support, HIPAA compliance, IP restrictions, Audit log, and SAML SSO. Enterprise pricing varies significantly based on seat count, contract length, and negotiated features.
Add-Ons to Budget For
- Monday AI: ~$12/seat/month additional. Includes AI-powered automation building, content generation in cells, and document summarization.
- Monday CRM: Separate product, requires its own subscription on top of core Monday.com pricing.
- Monday Dev: Separate product for software development teams with sprint management and backlog features.
- Extra automation actions: If you exceed your monthly automation quota, you purchase action packs at additional cost.
Monday.com Pros: What It Does Better Than Anyone
- Fastest time-to-value in the industry: Most teams are productively using Monday.com within 1-3 days. No consultant needed, no long implementation, no IT involvement required.
- Universal adoption across departments: Unlike developer-centric tools (Jira) or spreadsheet-centric tools (Smartsheet), Monday.com works equally well for marketing, HR, finance, product, and operations. One platform can replace 3-4 departmental tools.
- Automation that non-technical users actually set up themselves: The “When / Then” recipe format makes automation accessible to anyone. Teams report saving 5-15 hours per week just from basic automations.
- Outstanding mobile apps: Monday.com’s iOS and Android apps are fully featured — you can create items, update statuses, comment, approve automations, and view all board types. For field teams, this is significant.
- Excellent template library: 200+ templates across marketing, IT, HR, sales, and operations. Most teams find a template that covers 70-80% of their use case and customize from there rather than starting from scratch.
Monday.com Cons: The Honest Problems
- 3-seat minimum inflates cost for small teams: A solo founder or 2-person team pays for 3 seats even if they only need 2. Competitors like ClickUp and Smartsheet don’t have this restriction.
- Recurring tasks require paid automations: Setting up recurring tasks (daily standup checklist, weekly report reminder) is technically possible but requires using your automation quota. On the Basic plan, there are no automations at all — a significant limitation.
- No native time tracking on lower plans: Time tracking is only available on the Pro plan and above. Teams that need time-based billing or work hour tracking need to either upgrade or integrate a third-party tool.
- Cross-board reporting has limits: While dashboards can pull data from multiple boards, the depth of cross-board analysis doesn’t match what dedicated reporting tools or Smartsheet’s Report Builder can do for large PMOs.
- Storage limits on lower plans: 5GB on Basic, 20GB on Standard, 100GB on Pro. Teams managing large video files, design assets, or CAD files will hit limits and need to pay for additional storage or use integrated cloud storage.
- Customer support inconsistency: Multiple G2 reviews cite slow response times from support and inconsistent quality. Enterprise customers report better experiences, but mid-tier customers sometimes wait days for resolution.
Monday.com vs. The Competition
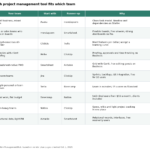
| Tool | Best For | Starting Price | Monday.com Advantage |
|---|---|---|---|
| Asana | Task management, cross-team | $10.99/user/mo | Better visual design, more views, AI included |
| ClickUp | Power users, all-in-one | $7/user/mo | Easier to use, faster adoption |
| Smartsheet | Enterprise, complex projects | $9/user/mo | Better UX, AI features, mobile app |
| Notion | Docs + lightweight PM | $10/user/mo | Better project management depth |
| Trello | Simple Kanban | $5/user/mo | Far more features, better scalability |
| Jira | Software dev teams | $8.15/user/mo | More accessible to non-developers |
Who Should Buy Monday.com in 2026?
Monday.com is the right choice if:
- You’re deploying to a mixed team of technical and non-technical users and need high adoption
- Your primary use cases are marketing campaigns, content production, client project management, or cross-departmental operations
- You want automation that your team actually configures themselves without needing IT or engineering
- You’re considering replacing multiple single-purpose tools (CRM, project management, docs) with one platform
- Mobile access is important for your team’s workflow
Consider alternatives if:
- You’re a very small team (1-2 people) and the 3-seat minimum pricing feels wasteful — ClickUp’s free plan is more generous
- You manage highly complex multi-dependency project schedules that require critical path analysis — Smartsheet handles this better
- Your industry requires FedRAMP, HIPAA, or other compliance certifications — verify Monday.com’s certification status matches your requirements
- You’re primarily a software development team running Scrum or Kanban sprints with deep Git integration — Jira remains the specialist choice
- Monday.com CRM Review 2026: Can It Replace Salesforce or HubSpot?
- Monday.com WorkForms: The Complete Guide to Building Smart Forms in 2026
- Microsoft Project to Monday.com Migration 2026: Step-by-Step Guide
- Monday.com WorkDocs 2026: Complete Guide to Collaborative Docs, AI Writing & Board Integration
- How to Build Custom Board Widgets with Monday Vibe in 2026
- Monday.com Service Management 2026: IT Help Desk & Ticketing Guide
- Monday.com Work OS vs Traditional Project Management: What Actually Changes in 2026
- How to Use Monday.com Gantt Charts in 2026: Complete Timeline & Dependency Guide
- How to Use Zapier with Monday.com in 2026: Complete Automation Guide
- Monday.com AI Work Platform 2026: What the May Relaunch Actually Means for Teams
- How to Set Up Monday.com CRM for Your Sales Pipeline in 2026
- How to Set Up Monday.com AI Agents in 2026 (Agent Factory Complete Guide)
- Monday.com Automations Not Working? Complete Troubleshooting Guide 2026
- Trello vs Monday.com 2026: Which Is Better for Visual Project Management?
Frequently Asked Questions About Monday.com
Is Monday.com free?
Yes, Monday.com offers a free forever plan for up to 2 users with 3 boards. It’s significantly limited — no automations, no integrations, no Timeline view — but it’s enough to evaluate the interface before committing. All paid plans require a minimum of 3 seats.
How long does Monday.com implementation take?
For small teams (under 20 people), most implementations are complete within 1-2 weeks: 2-3 days to set up initial boards and workflows, then a week for the team to get comfortable. Larger enterprise deployments with data migration from existing tools, custom integrations, and multi-department rollouts typically take 4-12 weeks with dedicated project management.
Can Monday.com replace Jira?
For non-technical teams, yes. Monday Dev is designed specifically as a Jira alternative with sprint planning, backlog management, and bug tracking. For dedicated engineering teams with deep Git integration needs, release tracking, and technical workflow customization, Jira still has an edge. Many companies use Monday.com for business teams and Jira for engineering, with integration between the two.
Does Monday.com have a desktop app?
Yes. Monday.com offers desktop apps for Mac and Windows, in addition to the web app and iOS/Android mobile apps. The desktop app is essentially a wrapped version of the web app but provides a dedicated window and some offline capabilities.
Final Verdict: Monday.com Review 2025
Monday.com earns its market position. It’s genuinely one of the best work management platforms available for teams that want fast adoption, visual workflows, and flexible automation without dedicated technical setup. The platform has matured significantly — the addition of AI features, Monday CRM, and Monday Dev show a company building a serious long-term platform rather than a single-point solution.
The pricing structure — particularly the 3-seat minimum and the cost of AI features as an add-on — is a genuine criticism worth weighing. At scale, Monday.com is not cheap. But for the right team, it delivers measurable productivity gains that justify the investment.
Rating: 4.5/5 — Excellent for cross-functional teams and marketing/ops organizations. Best-in-class for adoption and ease of use. Competitive weaknesses in deep project scheduling and cross-project enterprise reporting.
📚 Related Reading on WorkManagement Hub
- → Monday.com Pricing 2026: Every Plan Compared
- → How to Use Monday.com for Project Management
- → ClickUp vs Monday.com for Agencies 2026
- Monday.com at a Glance (2025)
- What Monday.com Actually Does Well
- Monday.com Pricing: The Real Breakdown (Including What They Don’t Advertise)
- Monday.com Pros: What It Does Better Than Anyone
- Monday.com Cons: The Honest Problems
- Monday.com vs. The Competition
- Who Should Buy Monday.com in 2026?
- Frequently Asked Questions About Monday.com
- Final Verdict: Monday.com Review 2025
🔗 Official Resources & Further Reading
Sponsored