Smartsheet WorkApps: How to Build No-Code Apps in 2026
- Smartsheet WorkApps let you turn any sheet, report, or dashboard into a branded no-code web app without writing a single line of code
- Role-based permissions are the killer feature — one app can show executives a summary view, managers a full grid, and field workers only a form
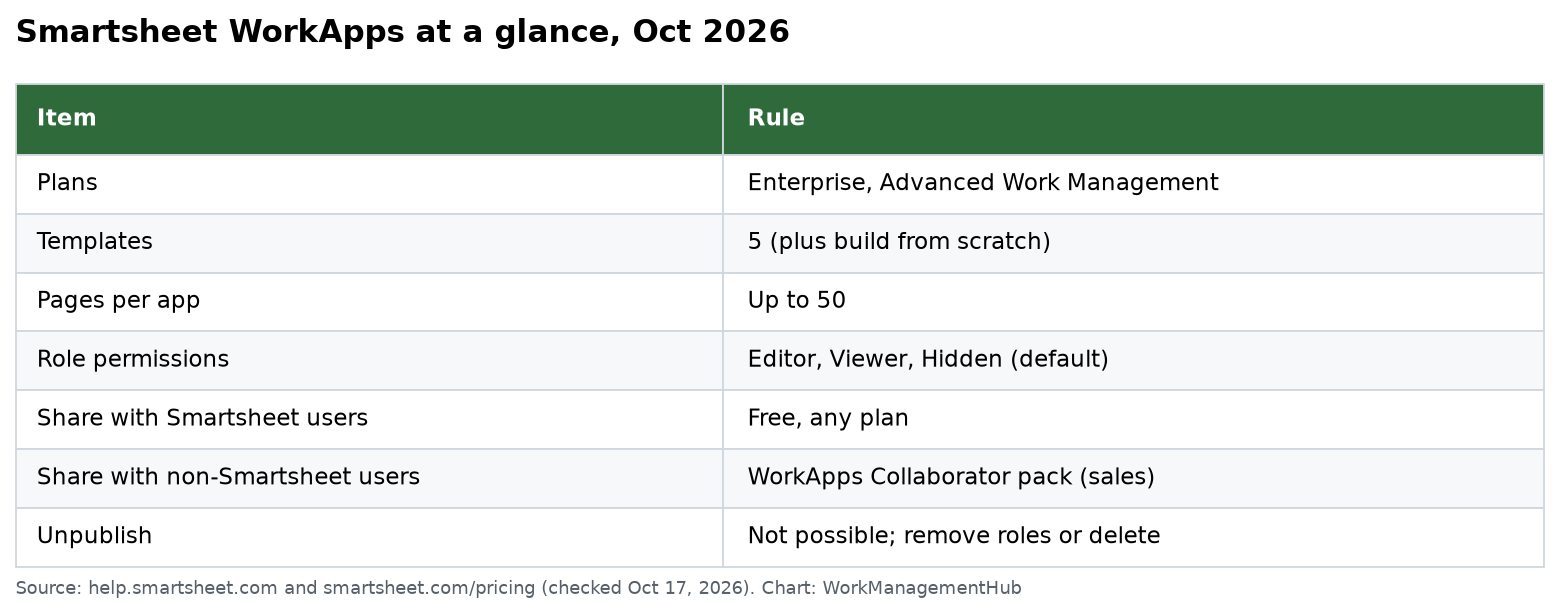
- WorkApps require Business or Enterprise plan and are built at workapps.smartsheet.com
- Published apps are instantly available on Smartsheet’s mobile app with no extra setup
- The biggest mistake teams make: building a single-role app when multi-role architecture is what makes WorkApps genuinely powerful
Smartsheet WorkApps: How to Build No-Code Apps in 2026
Smartsheet WorkApps are no-code web portals that package your sheets, dashboards, forms, and reports into a branded, role-gated application — available on Business and Enterprise plans. You build them at workapps.smartsheet.com, assign different roles so each stakeholder sees only what they need, and publish in minutes with no coding required.
- What Are Smartsheet WorkApps?
- Which Plans Include WorkApps
- WorkApps Building Blocks: Pages, Roles, Permissions
- How to Create Your First Smartsheet WorkApp: Step-by-Step
- Adding and Configuring Pages
- Setting Up Roles: The Multi-Stakeholder Architecture
- Publishing and Sharing Your WorkApp
- Branding Your WorkApp
- Real-World WorkApp Templates by Use Case
- WorkApps on Mobile
- Common WorkApp Mistakes
- Verdict
- FAQ
What Are Smartsheet WorkApps?
If you have spent any time managing projects in Smartsheet, you already know the pain of sharing data with stakeholders who are not power users. You share a sheet, and immediately someone accidentally filters half the rows away. You share a dashboard, and the client starts asking why they can see column data they were never supposed to touch. You send a form link, but now the field worker has no way to check the status of their previous submissions. The traditional Smartsheet sharing model — sheet by sheet, dashboard by dashboard — was never designed for the reality of modern enterprise teams where a single dataset needs to serve five completely different audiences simultaneously.
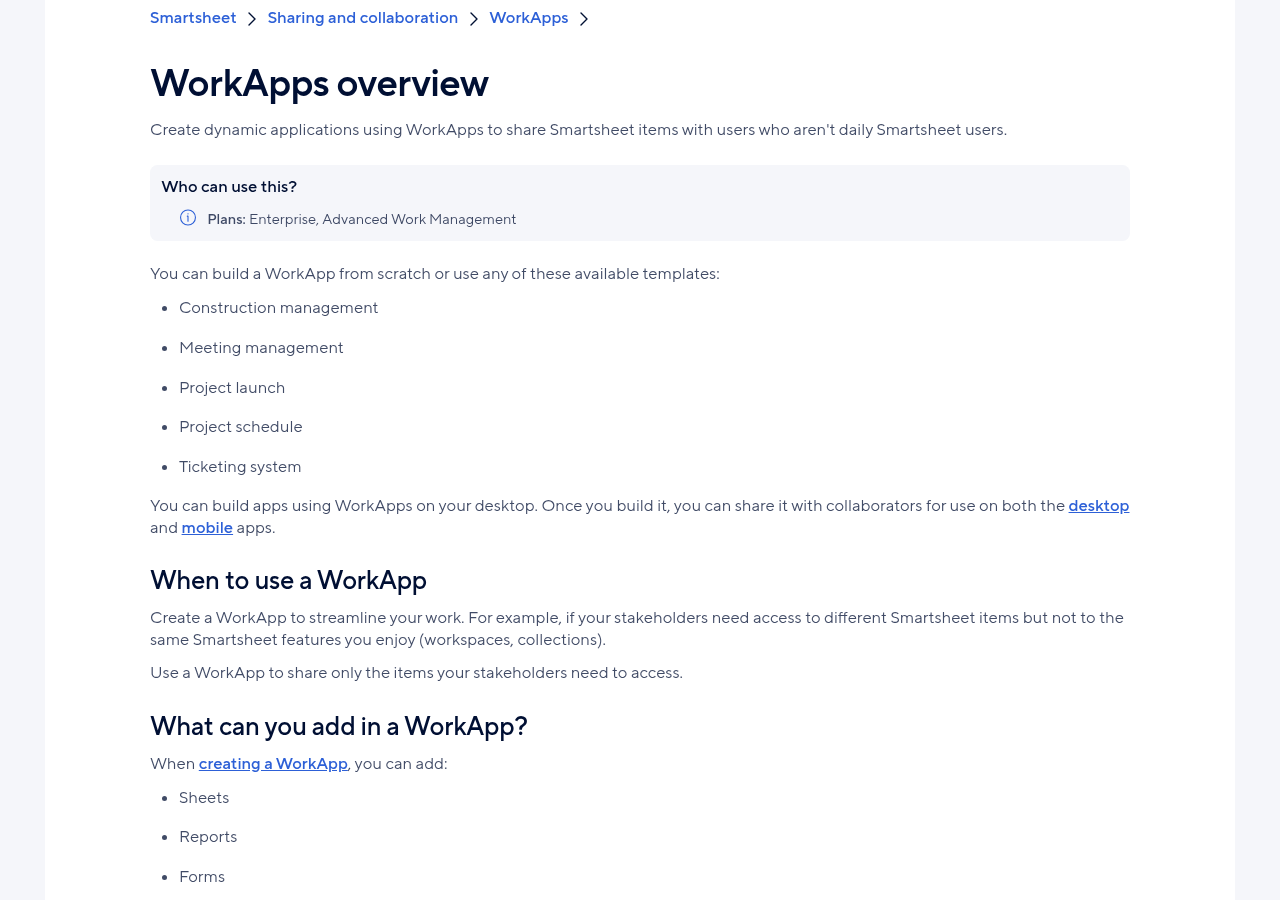
Smartsheet WorkApps were built to solve exactly this problem. A WorkApp is a branded, role-gated web application that you assemble from your existing Smartsheet assets — sheets, reports, dashboards, forms, and even external URLs — without writing a single line of code. Instead of handing stakeholders raw access to your underlying data, you build a curated, professional-looking portal where each type of user sees precisely the view they need and nothing they do not.
Think of it this way: your master project sheet remains the single source of truth. But instead of exposing that raw sheet to everyone, you build a WorkApp on top of it. The executive opens the app and sees a clean dashboard of KPIs. The project manager opens the same app and gets the full interactive grid where they can edit tasks and update statuses. The field worker opens the app and sees only a form to log their daily progress and a filtered view of their own assigned tasks. One dataset. Three completely different experiences. Zero code. That is the WorkApp promise — and when it is executed well, it genuinely transforms how enterprise teams operate.
WorkApps are distinct from simple Smartsheet sharing in one critical way: they create a separation layer between your data and your audience. This is not cosmetic. It has real security and operational implications. When you share a sheet directly, the recipient gets access to that sheet’s URL and can potentially navigate to related sheets. When you publish a WorkApp, members only see what the app exposes — no raw sheet URLs, no unintended column visibility, no risk of someone stumbling into data they were not authorized to view.
The WorkApp concept is not unique to Smartsheet — low-code and no-code portals have been a growing category across the enterprise software landscape for years. But Smartsheet’s implementation is notable for how tightly it integrates with the existing sheet-and-report data model most teams are already using. You do not need to rebuild your data structure to use WorkApps. You just wrap a purpose-built interface around what you already have. That frictionless on-ramp is why WorkApps adoption has accelerated significantly among mid-market and enterprise Smartsheet customers in recent years.
Which Plans Include WorkApps
WorkApps are a premium feature available exclusively on Smartsheet’s Business and Enterprise plans. If you are on the Pro plan or using a free trial account, WorkApps will not be accessible in your environment — the workapps.smartsheet.com portal will redirect you to an upgrade prompt.
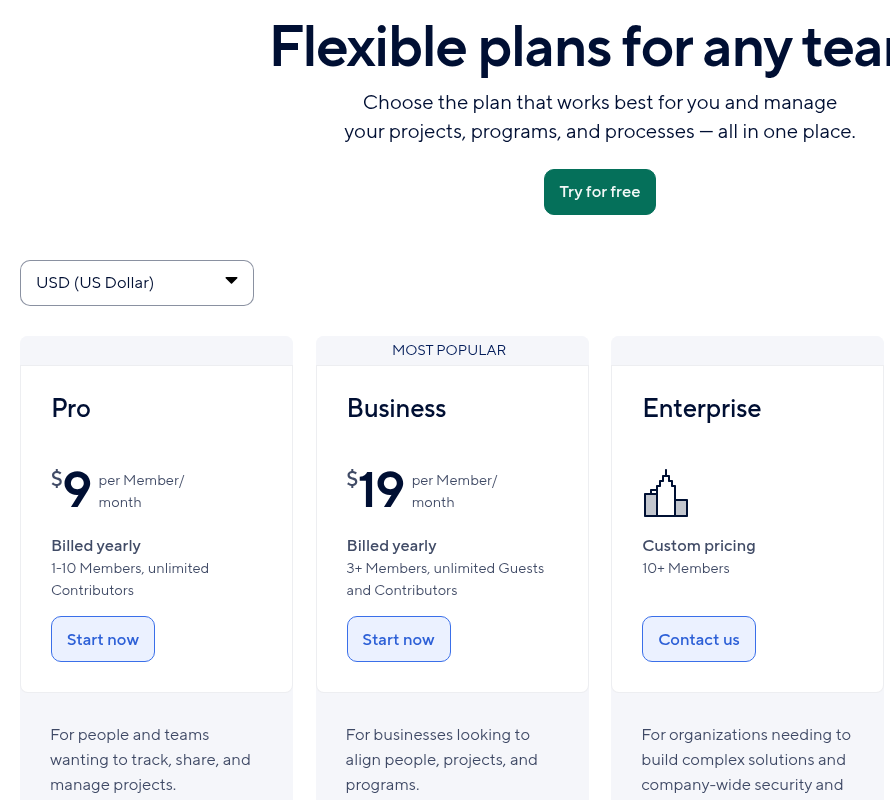
As of 2026, Smartsheet’s Business plan starts at approximately $25 per licensed user per month (billed annually), and Enterprise pricing is custom-negotiated based on seat count and feature requirements. If you are evaluating whether the Business plan upgrade is worth it for your team, WorkApps alone often justifies the cost for organizations that regularly deliver project data to external clients or field teams. For current pricing details, check the official Smartsheet pricing page.
One of the most commercially compelling aspects of WorkApps is the licensing model for app-only users. A full Smartsheet licensed seat is required for the people who build and administer the WorkApp, and for any users who need to access Smartsheet’s core grid features directly. However, external stakeholders — clients, vendors, field workers, executives who only need to consume data — can be added to a WorkApp as app-only members. App-only members can interact with the WorkApp (submit forms, view dashboards, update rows where they have editor permissions) without consuming a paid Smartsheet license.
This distinction is significant for large-scale deployments. Imagine you are a construction company with 15 licensed project managers and 200 field workers who need to submit daily reports and view their task assignments. Under traditional Smartsheet sharing, you would theoretically need 215 paid seats. With WorkApps, your 15 project managers hold licensed seats, and your 200 field workers access the WorkApp as unlicensed app-only members. The cost savings are substantial, and this is one reason WorkApps have become a core part of enterprise Smartsheet deployments across industries.
It is worth noting that while app-only members do not consume a Smartsheet seat license, your organization’s Enterprise agreement may have its own terms around how many app-only users are permitted. For very large external deployments — thousands of field workers or clients — check your contract terms before assuming unlimited app-only access. Most Business plan customers find the standard terms sufficient for their use cases.
For more context on how Smartsheet structures its full feature set and how WorkApps fits into a broader implementation, review our Smartsheet for beginners guide which covers plan selection and initial setup in detail.
WorkApps Building Blocks: Pages, Roles, Permissions
Before you build your first WorkApp, you need to understand its three core structural pillars. These are not just UI concepts — they represent the architectural decisions that determine whether your WorkApp becomes a genuinely useful tool or a confusing mess that nobody adopts.
Pages: The Content Layer
Pages are the individual screens inside your WorkApp. Every page is sourced from a Smartsheet asset: a sheet, a report, a dashboard, a form, an external URL, a video, or a slideshow. When you add a page, you are essentially embedding that asset into the WorkApp’s navigation structure. A page can be named anything you want — “Project Status,” “Submit Daily Report,” “Budget Overview” — and it appears in the WorkApp’s left-side navigation panel. Users click between pages the same way they would navigate between sections of any web application.
The key insight about pages is that the same underlying Smartsheet asset can power multiple pages in the same app, configured differently for different purposes. You might have one page called “My Tasks” that shows a filtered report of the current user’s assigned work, and another page called “All Tasks” that shows the full project grid — both sourced from the same master sheet but presented differently based on the role viewing them.
Roles: The Access Control Layer
Roles are user-defined labels that control which pages each type of user can see and interact with. You create role names that reflect your actual stakeholder groups — “Executive,” “Site Manager,” “Field Technician,” “Client,” “Finance,” whatever makes sense for your organization. Roles are not Smartsheet’s permission levels (admin, editor, viewer) — they are WorkApp-specific constructs that exist only within the app.
When you configure each page, you specify which roles can see it. A page can be visible to all roles, visible to specific roles only, or hidden from all roles (useful while you are still building it). This role-to-page mapping is the heart of the WorkApp architecture and is what enables the “one app, multiple audiences” pattern.
It is important to understand that WorkApp roles and Smartsheet permission levels operate independently but together. A user might have a WorkApp role of “Field Worker” (meaning they see only two pages), but they still need appropriate Smartsheet permissions on the underlying sheets to interact with the data those pages surface. If a field worker’s WorkApp role gives them access to a form page, the underlying Smartsheet form must allow submissions from anyone or from that specific user. If their role includes an editable sheet page, they need at least Editor permissions on that sheet in Smartsheet proper. The WorkApp role controls navigation visibility; the Smartsheet permission controls what they can do with the data they can see.
Members: The Access Layer
Members are the actual people who have access to your WorkApp. When you add a member, you assign them a role from the roles you have created. A member inherits all the page visibility rules associated with their role. You can add members individually by email or, for Enterprise plans, via group assignments. Members receive a notification with the WorkApp link and can access the app immediately after it is published.
Members can be licensed Smartsheet users or app-only users (external stakeholders without a full license). The member management interface in the WorkApp Builder shows you each member’s email address, their assigned role, and their access status. You can change a member’s role at any time — useful when a field worker is promoted to site manager and needs expanded app access.
How to Create Your First Smartsheet WorkApp: Step-by-Step
Let’s walk through the entire process of creating a WorkApp from scratch. I will use a project management scenario throughout so you can see how the decisions connect in a realistic context.
- Navigate to workapps.smartsheet.com — sign in with your Smartsheet credentials; you’ll land on the WorkApps home screen showing all existing apps. If this is your first time, the screen will be empty with a prompt to create your first app. The WorkApps portal is a separate environment from your main Smartsheet interface, though it reads from the same account and the same underlying data.
- Click “+ Create app” in the upper-right corner — this opens the app setup wizard. The wizard is minimal: it asks for a name, an optional description, and nothing else. Unlike many enterprise tools, Smartsheet does not front-load the setup with configuration screens — you make most decisions inside the builder itself.
- Name your app and add an optional description — this name appears in the app header and mobile app list, so choose something your end users will recognize immediately. “ACME Construction — Project Portal 2026” is clearer than “Project App.” The description is internal-facing and helps you and your colleagues identify the app’s purpose when you have multiple WorkApps in your organization.
- Click “Create” — you land in the WorkApp Builder, a two-panel layout with Pages on the left and a live preview on the right. The builder auto-creates a default page structure that you will replace with your own content. At this point your app exists but is not yet published — you are in draft mode and can make changes freely without affecting any live users.
At this stage, you have an empty WorkApp container. The real work begins with adding pages and defining roles. I recommend spending ten minutes sketching out your role structure on paper before diving into the builder — knowing which roles you need and roughly what each role should see makes the subsequent configuration significantly faster.
Adding and Configuring Pages
Pages are the backbone of your WorkApp’s user experience. Here is how to add and configure each type effectively, along with practical guidance on when to use each page type.
- Click “+ Add page” in the left panel of the WorkApp Builder. A modal appears asking you to choose a page type. The options are: Sheet, Report, Dashboard, Form, External URL, Video, and Slideshow. Each has different use cases and trade-offs.
- Sheet pages embed a Smartsheet sheet directly into the app. Users with editor permissions on the underlying sheet can make edits inline, just as they would in the main Smartsheet interface. Use sheet pages sparingly and only for internal power users — sheets expose all columns and can be overwhelming for non-technical stakeholders. If you need to show a subset of data to a broader audience, use a Report page instead. For more on structuring sheet data effectively for presentation layers, our Smartsheet dashboards guide covers how to prepare your underlying data architecture.
- Report pages are one of the most powerful and underutilized page types in WorkApps. A Report pulls filtered, column-limited data from one or more sheets and presents it as a clean grid. Because you control exactly which columns appear in the Report, you can create a Report page that shows field workers only their name, task, status, and due date — stripping out budget figures, internal notes, and other sensitive columns. This is significantly safer and cleaner than sharing a raw sheet, and it is the approach I recommend for any page that surfaces data to non-administrative users.
- Dashboard pages embed a Smartsheet dashboard — charts, metric widgets, shortcut buttons, rich text — into the WorkApp. This is ideal for executive views, client-facing summaries, and KPI overviews. Dashboards are predominantly read-only, which makes them appropriate for audiences who need to consume information without modifying underlying data. For detailed dashboard construction techniques, see our Smartsheet dashboards guide.
- Form pages embed a Smartsheet form, allowing users to submit new rows to an underlying sheet without ever seeing the sheet itself. This is the standard pattern for field data collection — field workers open the WorkApp, navigate to the “Submit Daily Report” page, fill out the form, and submit. The data lands in the master sheet, automations fire, managers get notified. The field worker never touches a spreadsheet. For setting up the notification automations that respond to form submissions, see our guide on Smartsheet automations.
- External URL pages embed any publicly accessible web page inside an iframe within the WorkApp. Use this for embedding Power BI reports, Tableau dashboards, company intranet pages, or any web tool your team already uses. Note that some websites block iframe embedding due to their own X-Frame-Options or Content-Security-Policy headers — test the URL in a preview environment before building your WorkApp architecture around an external embed.
- Video and Slideshow pages are useful for onboarding content, training materials, and announcements. Embedding a short training video directly in the WorkApp gives new field workers a reference guide alongside their daily reporting form. This reduces onboarding friction significantly — instead of emailing training materials separately, everything lives in the same app the user is already accessing for their daily tasks.
- Configure page visibility per role — after adding each page, click the page settings to define which roles can see it. This is where the multi-stakeholder architecture comes to life. Toggle each page’s visibility for each role until every role’s navigation shows only what is relevant to them. Work through every page systematically — I find it helpful to do one role at a time rather than one page at a time, as it helps you experience what each role will see as a coherent whole.
Setting Up Roles: The Multi-Stakeholder Architecture
This is the most important section of this guide. Most teams that use WorkApps ineffectively do so because they create a single role and give everyone the same experience. That defeats the entire purpose of WorkApps. The architecture that makes WorkApps genuinely transformative is the multi-role pattern — one app, multiple curated experiences, one underlying dataset.
Creating Your Roles
In the WorkApp Builder, navigate to the “Roles” tab in the left panel. Click “+ Add role” and create a name for each type of stakeholder who will use this app. Role names should reflect your actual organizational language. If your field team calls their supervisors “Site Supers,” name the role “Site Supervisor” rather than “Manager” — familiar terminology increases adoption and reduces confusion during onboarding.
A typical project management WorkApp might have three to five roles:
- Executive — senior leadership who need high-level status, budget summaries, and milestone overviews
- Project Manager — the team running the work day-to-day, needing full edit access to task grids, resource views, and risk logs
- Field Worker — on-site or frontline staff who submit status updates and need to see their own task assignments
- Client — external stakeholders who see milestone progress and deliverable status but no internal cost data or team notes
The One Dataset, Three Views Pattern
The power of this architecture becomes clearest with a concrete example. Imagine you are running a commercial construction project. Your master Smartsheet contains hundreds of rows — every task, every subcontractor, every budget line, every inspection record. Here is how a WorkApp transforms access to that single dataset:
Executive view: The Executive role sees two pages — a Dashboard showing total project budget vs. actual spend, a milestone tracker, and a red/amber/green status widget. They also see a high-level report showing only the top ten milestones and their percent complete. Nothing else. Executives do not need to see individual task rows or subcontractor details. Keeping their view clean means they actually use the app — and they get the answers they need in thirty seconds rather than spending ten minutes parsing a 400-row spreadsheet.
Project Manager view: The Project Manager role sees five pages — the full task sheet with edit access, a resource allocation report, a risk and issues log, a budget tracking dashboard, and a form for logging change orders. This is the power user experience. Managers can edit rows directly, drill into data, and submit structured updates through the change order form. The Smartsheet resource management integration pairs well here, giving managers a capacity view alongside their task management.
Field Worker view: The Field Worker role sees two pages — a filtered report showing only tasks assigned to the current user (Smartsheet’s current user filtering makes this dynamic without any code), and a form for submitting their end-of-day progress report. That is it. Simple, focused, mobile-friendly. Field workers are not project managers — they need to see their work and report their progress, not navigate a complex enterprise project structure.
The same master sheet powers all three views. When a field worker submits a progress report through the form, the data lands in the sheet, a Smartsheet automation fires to update the task status, and the project manager sees the update in their full grid view. The executive’s dashboard widget refreshes automatically. The entire chain runs without any manual data transfer, and each stakeholder only ever saw what they were supposed to see.
Assigning Page Visibility Per Role
After creating your roles, go through each page in your WorkApp and configure its visibility. Select a page, open its settings, and you will see a list of your roles with toggles. Enable the page for the roles that should see it. Disable it for all others. Work through every page systematically until each role’s navigation is clean and purpose-built.
A practical tip: build all your pages first, then configure visibility across all roles in one pass. This gives you a complete picture of the app before you start restricting access, and it prevents the common mistake of hiding a page you forgot to connect to the right role. Use the role preview function in the WorkApp Builder after configuring visibility to simulate each role’s experience and catch any gaps before publishing.
Publishing and Sharing Your WorkApp
Once your pages are configured and your roles are defined, you are ready to add members and publish. Follow these steps in order — skipping role testing before publishing is the most common source of post-launch embarrassment.
- Navigate to the “Members” tab in the WorkApp Builder left panel. This is where you manage who has access to the app and what role they hold.
- Click “+ Add member” and enter the email address of the person you want to invite. For each member, select their role from the dropdown — this determines which pages they will see when they access the app.
- For app-only users (external stakeholders without Smartsheet licenses), the process is identical — add their email, assign a role. Smartsheet handles the access without requiring them to purchase a seat. They will receive an invitation email and can access the WorkApp through a web browser or the Smartsheet mobile app.
- Test all roles before publishing. Use the role preview functionality in the WorkApp Builder to switch between role views and confirm that each role sees exactly the right pages with the right level of data access. Click through every page for every role. This step is critical — it is much easier to catch visibility errors in preview than after your CEO has already opened the app and seen a subcontractor cost breakdown they were not supposed to see. Five minutes of testing prevents hours of damage control.
- Click “Publish” in the upper-right corner of the WorkApp Builder. Publishing makes the app live for all members. The app moves from draft to published status. Any subsequent changes you make in the builder will exist as a new draft and will not appear to users until you publish again — which gives you a safe way to make iterative improvements without disrupting live users mid-session.
- Copy the shareable link from the app settings. You can share this link directly with members, though members who have already been added will also receive an email invitation automatically. The link is unique to your WorkApp and requires authentication, so only added members can access it — it is not a public URL that anyone can view.
For organizations using Smartsheet Data Shuttle to import external data into their sheets, WorkApps become even more powerful — your WorkApp can serve as the user-facing portal for data that is automatically loaded from external systems, creating a seamless intake-to-reporting pipeline with no manual data entry at the Smartsheet layer. Data Shuttle imports the data, automations process it, and WorkApps surface it to the right audiences. This three-layer architecture represents the mature Smartsheet implementation pattern for enterprise teams.
Branding Your WorkApp
One of the features that generates the most positive stakeholder feedback is WorkApps branding. A branded app does not look like a spreadsheet tool — it looks like a professional purpose-built application. This matters enormously for client-facing deployments where perception of professionalism directly affects the client relationship, and for field worker deployments where a familiar, branded interface drives adoption.
- Open app settings by clicking the gear icon or “App settings” option in the WorkApp Builder. The branding panel is typically found within the appearance or settings section of the builder interface.
- Upload your logo. The logo appears in the WorkApp header, visible at the top of every page. Use a PNG with a transparent background for best results — logos with white backgrounds look awkward against colored navigation bars. The logo is visible to all users regardless of role, so use your organization’s main brand mark or a project-specific logo lock-up if the WorkApp is dedicated to a single client or project.
- Set your accent color using the color picker. The accent color applies to navigation highlights, active page indicators, button elements, and other UI accents throughout the app. Match this to your brand’s primary color or your client’s brand color for white-label deployments. Using a client’s brand colors when building a client-facing portal is a small touch that consistently generates positive comments.
- Upload a thumbnail image. The thumbnail appears on the WorkApps home screen at workapps.smartsheet.com and in the Smartsheet mobile app’s WorkApps list. This helps users visually identify the right app quickly when they have access to multiple WorkApps. Use a project photo, a logo lock-up, or a simple branded graphic that is recognizable at small sizes — the thumbnail displays at approximately 200×120 pixels.
- Set a bookmark icon (also called a favicon). This small icon appears in browser tabs when users have the WorkApp open, and it is used as the app icon when users add the WorkApp to their mobile device’s home screen. A clear, simple icon at 32×32 or 64×64 pixels works best — avoid complex logos that become unreadable at small sizes. A simple monogram or simplified logo mark is the right choice here.
The combination of a custom logo, matched accent color, and branded thumbnail transforms the app from “a Smartsheet thing” into “our project portal” in the eyes of stakeholders. This is not vanity — it drives measurable adoption differences. Users are more likely to return to and trust an app that feels intentionally designed for them. In client-facing contexts, branding a WorkApp with the client’s colors before your first demo can shift the entire tone of a project kickoff meeting.
Real-World WorkApp Templates by Use Case
Here are three complete WorkApp architectures I have deployed with real enterprise teams, presented as templates you can adapt directly. Each follows the same multi-role principle but tailored to the specific dynamics of its industry context.
1. Construction Site Management App
This is one of the most common and highest-value WorkApp deployments. A commercial construction company managing multiple active projects needs to surface data to four distinct audiences simultaneously, each of whom has fundamentally different information needs and technical comfort levels.
Roles: Executive, Site Manager, Field Worker, Client
Executive pages (2): Portfolio Dashboard (budget vs. actual for all active projects, milestone heat map, risk summary), Executive Report (top milestones by project, percent complete, responsible party, forecast completion date). The executive sees nothing granular — no individual task rows, no subcontractor details, no day-to-day operational noise. Everything is aggregated and visual. This is a two-tap experience: open app, see status. That is all an executive needs.
Site Manager pages (5): Full Task Grid (editable sheet view with all columns including budget, subcontractor, inspection dates, and dependencies), Resource Allocation Report (who is working on what, by trade and by week), Risk and Issues Log (filtered report of open risks with impact ratings and mitigation owners), Change Order Form (structured submission form that creates a new row in the master sheet and triggers an approval workflow), Budget Tracking Dashboard (budget vs. actual spend broken down by cost category and work package). Site managers need full operational visibility and the ability to make direct changes to the data.
Field Worker pages (2): My Tasks (report filtered to the current user’s assigned tasks — shows task name, location, status, due date, and priority only, with no budget or cost columns visible), Daily Report Form (simple mobile-optimized form to log progress notes, attach site photos, flag safety issues, and mark tasks complete). The navigation is simple enough that a worker can use it in two minutes on a phone screen while standing on a job site.
Client pages (2): Project Status Dashboard (milestone timeline with percent complete, schedule variance, and upcoming key deliverables — formatted for a non-technical audience), Deliverables Tracker (filtered report of all client-facing deliverables showing description, planned delivery date, and current status, with no internal cost data or team-facing notes). Clients see progress and deliverables. Nothing internal. The Dashboard uses green/amber/red status indicators that communicate at a glance without requiring any data literacy.
2. IT Helpdesk App
An IT team managing internal support tickets has two very different user groups: the IT team who researches and resolves tickets, and the general staff who submit them. The raw ticket sheet has columns for internal triage notes, escalation paths, vendor reference numbers, and resolution documentation that end users have no reason to see — and which create confusion when they do.
Roles: IT Team, End User
IT Team pages (3): Full Ticket Queue (complete sheet view with all columns — category, submitter, priority, assignee, internal notes, resolution status, vendor escalation path), Open Tickets by Assignee (report grouped by IT team member showing their current open workload, useful for team lead resource management), New Ticket Form (even IT staff use the structured form to log tickets on behalf of others, ensuring consistent data entry across all ticket sources). The full ticket queue includes columns for internal triage notes and root cause analysis that end users never see.
End User pages (2): Submit a Ticket (form page with fields for category, description, urgency level, affected system, and an attachment option for screenshots), My Tickets (report filtered to the current user’s submitted tickets showing ticket reference number, category, submission date, and current status — nothing else). End users can submit tickets and track their own submissions through resolution. They cannot see other users’ tickets, cannot see internal IT notes, and cannot access the priority or assignee fields that IT manages internally.
This WorkApp eliminates the need for a separate ticketing system for organizations already using Smartsheet. The Smartsheet automations handle ticket assignment routing, status update notifications to submitters, SLA breach alerts to IT management, and resolution confirmation emails — all triggered by changes to the underlying sheet that users interact with through the WorkApp.
3. Marketing Campaign Tracker
A marketing agency managing multiple simultaneous campaigns needs to serve the CMO, campaign managers, and external freelancers from the same data source. Budget data must be visible to managers but not to freelancers. Freelancers need to see only their own assigned deliverables, not the full campaign roster. The CMO needs outcome metrics, not task-level operational detail.
Roles: CMO, Campaign Manager, Freelancer
CMO pages (2): Campaign KPI Dashboard (reach, engagement, conversion rate, and spend metrics aggregated across all active campaigns, with trend lines and period-over-period comparisons), Campaign Pipeline (high-level report showing all campaigns, their current phase, target launch date, assigned campaign manager, and overall RAG status). The CMO sees outcomes and portfolio health, not granular task lists or individual freelancer assignments.
Campaign Manager pages (4): Full Campaign Timeline (Gantt-capable sheet view with all tasks, dependencies, owners, start dates, and due dates — fully editable), Content Calendar (filtered report of all content deliverables across their assigned campaigns with deadlines and approval statuses), Budget Tracker (dashboard showing campaign budget vs. actual spend broken down by content type and channel), Freelancer Briefing Form (structured form to create new task assignments — fills in task name, campaign, brief description, due date, and rate — which creates a row in the master sheet that the assigned freelancer will then see in their view). Campaign managers run all operational detail and control what freelancers see by managing the underlying data.
Freelancer pages (2): My Assignments (report filtered to the current user’s assigned tasks — shows task name, campaign name, creative brief, due date, and delivery instructions — no rate information, no other freelancers’ assignments, no budget data), Submit Deliverable (form that marks a specific task complete and accepts an attachment or URL for the final deliverable — this triggers a review notification to the campaign manager). Freelancers see their work. They submit deliverables. Nothing else is visible to them. For agencies managing resource capacity across campaigns, pairing this WorkApp with Smartsheet resource management creates a complete end-to-end campaign operations platform.
WorkApps on Mobile
One of WorkApps’ most practical features is its automatic mobile availability. When you publish a WorkApp, it immediately appears in the Smartsheet mobile app for all members who have the app installed on their device. There is no separate mobile configuration, no additional publishing step, and no mobile-specific build required. The mobile experience mirrors the web experience — the same pages, the same role-based visibility, the same live data — rendered in the mobile-optimized Smartsheet interface.
For field workers specifically, mobile access is often the primary and sometimes the only use case. A field worker on a construction site is not going to open a laptop to submit their end-of-day report. They need a mobile app that opens quickly, shows their tasks, and lets them submit a form in under two minutes without requiring a technical tutorial. WorkApps on mobile delivers exactly this when the WorkApp is designed with the field worker role in mind — minimal pages, simple navigation, mobile-optimized forms with photo attachment capability.
To add a WorkApp to a mobile device’s home screen for a native app-like experience, users can use their mobile browser’s “Add to Home Screen” option (available on iOS Safari and Android Chrome) after navigating to the WorkApp URL. The bookmark icon you configured in the branding step becomes the home screen icon, giving it the visual appearance of a native app. When tapped from the home screen, the WorkApp opens full-screen without browser chrome, which completes the native app illusion effectively. For field worker deployments, configuring this during an on-site setup session significantly increases daily adoption — an icon on the home screen labeled “Daily Report” is far less intimidating than “open the Smartsheet app, find WorkApps, find the project.”
One important limitation to communicate clearly to your team before rollout: WorkApps are not fully offline-capable. If a user is in an area with no cellular or WiFi connectivity, they cannot load or submit data through the WorkApp. For teams operating in genuinely offline environments — underground construction, remote sites, areas with poor coverage — this is a real operational constraint that needs to be planned around. The standard approach is to ensure users submit their reports at a point in the day when they have connectivity (end of shift before leaving the site perimeter, for example) rather than after they have left the coverage zone. There are no offline drafts or queued submissions that sync when connectivity is restored.
Common WorkApp Mistakes
After deploying WorkApps across dozens of enterprise teams in construction, professional services, healthcare administration, and marketing, these are the five mistakes I encounter most consistently — and how to avoid each one.
Mistake 1: Building a Single-Role App
The most common WorkApp failure is creating a WorkApp with only one role and giving everyone the same experience. This is essentially just a repackaged collection of shared assets — you get the branded wrapper without any of the access control benefit that justifies building a WorkApp in the first place. If you find yourself building a WorkApp with a single role that all users share, stop and ask what problem you are actually solving. If all your users genuinely need the same view of the same data, sharing a dashboard or report directly might be the simpler solution. The WorkApp pattern earns its complexity when different stakeholder groups have genuinely different information needs — which is almost always the case in real organizations.
Mistake 2: Adding Too Many Pages
More is not better in WorkApp design. I have seen WorkApps with twelve or more pages that nobody uses because the navigation is overwhelming and it is not clear where to go for what. Keep each role’s visible page count to five to seven maximum. If you find yourself adding more pages, ask whether some of them could be combined into a single well-designed dashboard or report with better filtering. The goal is that a user can find what they need within two navigation steps — not that every possible data view is theoretically available somewhere in the app. Ruthless simplicity in page structure is what separates a WorkApp people actually use from a WorkApp that gets abandoned after the first week.
Mistake 3: Using Sheets Instead of Reports as Page Sources
This is the security and usability mistake that I see most often from teams new to WorkApps. When you add a Sheet page, the user sees every column in that sheet — including columns that may contain sensitive data you did not intend to expose. Budget figures, internal team notes, vendor costs, personal contact information, and escalation paths can all be inadvertently visible if you use a raw sheet as a page source for a broad audience. Reports let you specify exactly which columns appear, which rows are visible via filters, and how the data is sorted and grouped. For any page that surfaces data to non-administrative users, use a Report as the source rather than the raw sheet. Build the Report first, configure it precisely as you want users to see it, test it, then add it as a Report page in the WorkApp. This approach also gives you a single point of control — when column visibility needs to change, you update the Report once rather than hunting through WorkApp settings.
Mistake 4: Sharing the App Before Testing All Roles
Publish to a personal test account first, or use the role preview functionality in the WorkApp Builder, before sending the app link to real stakeholders. Simulate every role’s experience and click through every page. Verify that the data visible in each view is appropriate for that audience. I have seen teams publish client-facing WorkApps only to discover that the Client role had accidentally been given access to an internal notes page containing frank assessments of the client’s own change request history. Five minutes of role-by-role testing before publishing would have caught this immediately. Make it a habit: never publish without previewing every role first. Create a short testing checklist and work through it for every WorkApp you build.
Mistake 5: Forgetting App-Only User Licensing for External Stakeholders
When you add external members — clients, vendors, field workers, consultants — be deliberate and intentional about whether they need a licensed Smartsheet seat or whether app-only member access is sufficient for their use case. If they will only ever interact with the WorkApp (submitting forms, viewing dashboards, checking their task status, updating their own assigned rows), they do not need a license and should be added as app-only members. If you accidentally add them as licensed users when app-only access would suffice, you are spending real budget unnecessarily. Conversely, if you need them to have direct access to Smartsheet sheets outside of the WorkApp — for example, if they will occasionally need to work in the raw sheet — they do need a full license. Know this distinction before you add members at scale, especially for large field worker or client populations where the licensing cost difference is substantial.
Smartsheet WorkApps is one of the most underused features in the platform — and one of the most powerful. If you’re on Business or Enterprise and still sharing raw sheets with stakeholders, you’re creating unnecessary noise and security risk. Build a WorkApp instead: it takes 30 minutes, creates a professional client-facing experience, and the role-based architecture means you never have to worry about a stakeholder seeing data they shouldn’t. Start with a two-role app (internal team + external client), master the pattern, then expand. The investment pays off the first time a client says “this looks so much more professional than a spreadsheet.”
Frequently Asked Questions
Do WorkApp users need a Smartsheet license?
No — external stakeholders can use a WorkApp without a full Smartsheet seat. They are added as app-only members, which means they can interact with the WorkApp (submit forms, view dashboards, update rows they have editor access to) without consuming a paid Smartsheet license. This makes WorkApps cost-effective for client portals and field worker deployments at scale. Licensed seats are required only for users who need direct access to Smartsheet’s core grid features outside of WorkApps, or for WorkApp builders and administrators who manage the underlying sheets and reports. For full details on licensing and what app-only members can and cannot do, see the official Smartsheet WorkApps documentation.
Can I embed external websites in a WorkApp?
Yes. WorkApps support External URL pages, which embed any publicly accessible website or web application inside an iframe within your WorkApp. This is useful for embedding Power BI reports, Tableau dashboards, internal intranet pages, or any web tool your team already uses alongside Smartsheet data. The key limitation is that some websites block iframe embedding due to their own security headers (X-Frame-Options or Content-Security-Policy directives). If an external URL you want to embed returns a blank page or an error, it is likely blocking iframe embedding at the server level — and there is no workaround on the WorkApps side. Test your target URLs before designing a WorkApp architecture around them.
How many pages can a WorkApp have?
There is no hard platform limit on the number of pages, but Smartsheet recommends keeping apps focused and purposeful. In practice, more than seven to eight pages tends to create a cluttered, difficult-to-navigate experience that reduces adoption across all role types. Keep each individual role’s visible page count to five to seven maximum. Use Reports as page sources rather than full sheets to keep each page focused on the specific data that role actually needs. If you find yourself with many more pages than that, consider whether you are trying to replace an entire Smartsheet workspace with a single WorkApp — a better architecture is often multiple focused WorkApps for distinct use cases rather than one large app trying to serve every possible need.
Can I use WorkApps with Smartsheet automations?
Yes — automations run on the underlying sheets regardless of whether those sheets are accessed through a WorkApp or directly in Smartsheet’s main interface. Approval workflows, update request automations, notification rules, and record-locking automations all continue to function normally when users interact with data through a WorkApp page. WorkApps do not intercept, break, or bypass any existing automation rules configured on the underlying sheets. In fact, WorkApps and automations are a natural and powerful combination: a field worker submits a form through the WorkApp, which creates a new row in the underlying sheet, which triggers an automation that notifies the project manager and updates a status column, which might trigger a second automation that alerts the client-facing dashboard to refresh. Users never leave the WorkApp, and the full automation chain executes invisibly in the background. See our Smartsheet automations guide for detailed automation setup instructions.
What is the difference between a WorkApp and a Smartsheet Dashboard?
A Dashboard is a single, predominantly read-only view of charts, metrics, summary widgets, and shortcuts built from sheet and report data. It has no role-based access control, no multi-page navigation, and limited interactive editing capability (only through embedded report widgets or form widgets). A Dashboard is shared as a single URL that all recipients see identically — there is no concept of different users seeing different content within the same Dashboard. A WorkApp, by contrast, is a multi-page application with role-based permissions, interactive grid editing, form submission, video and external content embedding, and a fully branded navigation shell. A WorkApp is a complete stakeholder portal. A Dashboard is one component — often the best component for executive-facing or client-facing summary views — that frequently lives inside a WorkApp as one of its pages. The most effective WorkApp architecture uses Dashboards as the executive-facing page, Report pages for operational users, and Form pages for data collectors — combining all three within a single branded WorkApp experience.