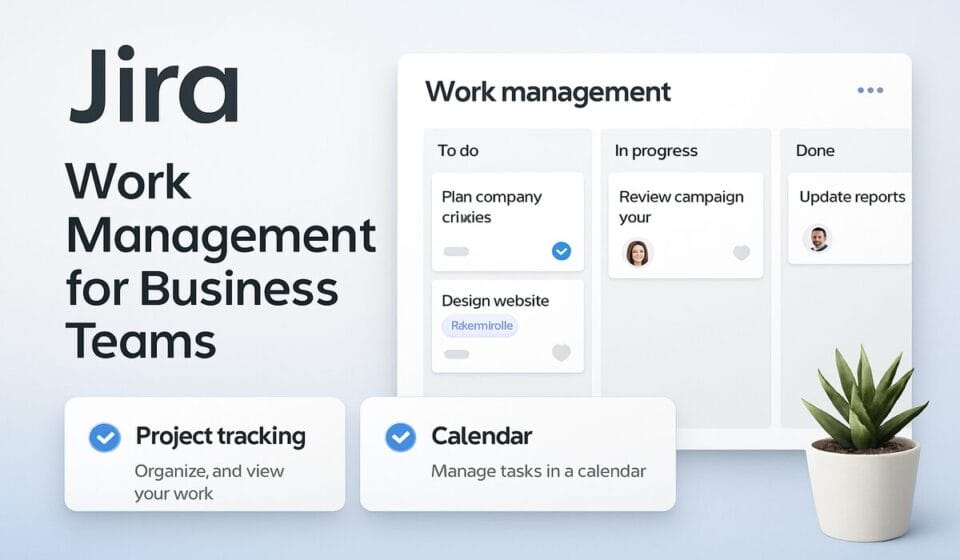

- Jira Work Management for business teams is Atlassian’s dedicated product for non-technical departments — HR, Finance, Legal, Marketing, and Operations — offering five purpose-built views: Board, List, Timeline, Calendar, and Form.
- JWM projects are created separately from Jira Software projects; you choose a business template (Marketing Campaign, HR Onboarding, Legal Review, etc.) when setting up the project.
- The Form view — added in 2023 and significantly improved in 2025 — lets any business team capture structured intake requests without giving external users Jira access.
- Atlassian Intelligence features (AI task summaries, smart field suggestions, auto-generated status updates) are available in JWM on Premium and Enterprise plans as of 2026.
- JWM integrates natively with Confluence for documentation and Jira Software for cross-team dependency tracking — making it the right choice for organizations already using either product.
- Pricing in 2026 is included in Jira Premium and Enterprise plans; standalone JWM access is available on Free and Standard tiers for teams without a Jira Software subscription.
To set up Jira Work Management for business teams, go to Projects, select Create project, choose a Business template (such as Marketing Campaign or HR Onboarding), configure your workflow statuses and custom fields, then activate the Board, Timeline, and Form views your team needs. Invite members, set permissions, and enable Atlassian Intelligence on Premium plans for AI-powered task management.
- What Is Jira Work Management and Who Is It For?
- JWM vs. Jira Software: Which Project Type Do You Need?
- How to Create a Jira Work Management Project (Step-by-Step)
- The Five JWM Views Explained: Board, List, Timeline, Calendar, and Form
- Configuring Workflows and Custom Fields for Business Teams
- Setting Up the Form View for Intake and Request Management
- JWM Templates by Team: HR, Finance, Legal, Marketing, and Operations
- Atlassian Intelligence Features in JWM 2026
- Native Integrations: Confluence, Jira Software, and Automation
- Permissions, Access Roles, and External Contributor Setup
- Verdict
- Related guides
📘 New here? Start with our The Ultimate Guide to Jira in 2026: Why It Dominates Dev Teams and Frustrates Everyone Else.
How to Set Up Jira Work Management for Business Teams in 2026
Jira Work Management for business teams solves a problem that predates the product itself: non-technical departments were either forced to use developer-centric Jira Software (too complex, wrong terminology) or manage work in spreadsheets and email (too fragile, zero visibility). When Atlassian released JWM as a generally available product in 2022 and steadily refined it through 2025 and into 2026, they made a credible case that one platform could serve HR, Finance, Legal, Marketing, and Operations teams without asking any of them to think like a software engineer.
I have set up JWM for teams ranging from 8-person legal departments to 200-person marketing organizations. The product works well when configured correctly — and fails quietly when it is not. This guide covers the complete setup process, from choosing the right template to activating Atlassian Intelligence features, with specific UI paths and real-world advice by team type.
What Is Jira Work Management and Who Is It For?
Jira Work Management is Atlassian’s project management product for business — as opposed to technical — teams. It shares the same underlying Jira Cloud platform as Jira Software but presents a different interface, different default workflows, different views, and different terminology. Where Jira Software uses “Epics,” “Stories,” and “Sprints,” JWM uses “Tasks,” “Subtasks,” and structured workflows with plain-English status names like “In Review” and “Awaiting Approval.”
The product is purpose-built for four functional team categories:
- HR teams — onboarding workflows, policy review cycles, headcount requests, performance review tracking
- Finance and Legal teams — contract review pipelines, budget approval processes, compliance checklists, vendor assessments
- Marketing teams — campaign management, content calendars, creative production pipelines, event planning
- Operations teams — process improvement projects, facilities requests, vendor management, cross-functional initiatives
The distinction from Jira Software matters for a practical reason: when you create a JWM project, Jira enables a simplified permission model, hides developer-specific fields, and surfaces views — particularly Calendar and Form — that are absent from Jira Software. Choosing the wrong project type at the start means retrofitting features that were never designed to work together.
JWM vs. Jira Software: Which Project Type Do You Need?
The question I get most often from business teams is whether to use JWM or just create a Jira Software project and configure it themselves. The honest answer depends on what your team actually does:
| Capability | Jira Work Management | Jira Software |
|---|---|---|
| Calendar view | Yes (native) | No |
| Form view (intake) | Yes (native) | No |
| Sprint / Scrum boards | No | Yes |
| Story points | No | Yes |
| Release management | No | Yes |
| Business workflow templates | Yes (HR, Legal, Marketing) | No |
| Cross-project linking to Jira Software | Yes | Yes |
| Atlassian Intelligence (2026) | Yes (Premium+) | Yes (Premium+) |
If your team does not run sprints and does not need release tracking, use JWM. If your team is a hybrid — say, a DevOps team that also manages change requests — consider a Jira Software project and link it to a JWM project for the business-side work. For teams fully integrating into an agile engineering organization, our guide on setting up Jira for agile teams in 2026 covers the software-side configuration in detail.
How to Create a Jira Work Management Project (Step-by-Step)
Creating a JWM project is a three-minute process if you know which template to select. The most common mistake is skipping the template selection and choosing “Scrum” or “Kanban” by accident — those create Jira Software projects, not JWM projects.
- Projects menu (top navigation bar) — Click Projects in the top navigation, then select Create project from the dropdown. This opens the project template gallery.
- Template Gallery — Business tab — In the template gallery, click the Business tab on the left sidebar (not “Software” or “Service Management”). You will see JWM-specific templates: Marketing Campaign, HR Onboarding, Legal Project, Content Management, Operations, and a blank Business template.
- Select a template — Choose the template that matches your team’s function. For example, select Marketing Campaign for a campaign pipeline or HR Onboarding for employee lifecycle management. Click the template card, review the preview on the right panel, then click Select template.
- Project details form — Enter your project Name (e.g., “Q3 Marketing Campaigns”), check the auto-generated Key (a short prefix like “MKT” — change it now if needed, as it cannot be changed later), and set Access to either Private or Limited. Click Create project.
- Project landing page — Jira opens your new project in the Board view by default. You will see a Kanban-style board with the workflow columns from your chosen template. The left sidebar shows all available views: Board, List, Timeline, Calendar, and Form.
The Five JWM Views Explained: Board, List, Timeline, Calendar, and Form
JWM’s five views are not interchangeable — each one serves a distinct planning or reporting function. Teams that activate all five but use only one are leaving the product’s biggest value on the table.
Board View
The Board is a Kanban-style drag-and-drop view organized by workflow status. It is the right view for daily team standups and for anyone who needs to answer “what is actively in progress right now?” Board does not support swimlanes or sprint cycles — it is a pure status-based view. When a card moves from “In Review” to “Approved,” it moves columns on the Board in real time.
List View
The List view renders all tasks in a sortable, filterable table with inline editing. It is the power-user view — the place where you bulk-edit fields, apply filters by assignee or priority, and manage large volumes of tasks without the visual overhead of cards. Finance and Legal teams tend to live in List view because their work is process-oriented rather than status-flow-oriented.
Timeline View
The Timeline is a Gantt-style view showing tasks against a date axis with dependency arrows. It requires tasks to have Start Date and Due Date populated to render correctly. Timeline is essential for campaign planning, onboarding schedules, and any project where sequence and timing matter. For connecting JWM timelines to cross-team roadmaps, see our guide on Jira Plans (Advanced Roadmaps) in 2026.
Calendar View
The Calendar renders tasks on a monthly or weekly calendar grid based on their due dates. It is the most intuitive view for non-Jira users — if someone on your HR team understands a Google Calendar, they can read the JWM Calendar view without training. It is the correct view for editorial calendars, compliance deadline tracking, and event management.
Form View
The Form view generates a shareable web form that creates Jira tasks on submission. It is the intake mechanism that separates JWM from every generic project management tool — you can capture structured requests from people who have no Jira account at all. Setup is covered in detail in its own section below.
Configuring Workflows and Custom Fields for Business Teams
The default workflow from a JWM template is a starting point, not a final answer. Every business team has approval gates, review stages, or compliance checkpoints that the template does not anticipate. Configuring the workflow correctly in week one prevents the pain of reorganizing work that has already started.
Editing Workflow Statuses
- Project Settings (left sidebar) — In your JWM project, click Project settings at the bottom of the left sidebar.
- Workflow section — Select Workflow from the project settings menu. You will see a visual diagram of the current workflow with colored status nodes and transition arrows.
- Add a status — Click Add status to create a new stage. Name it precisely (e.g., “Legal Review” rather than “Review” — ambiguity kills workflow adoption). Assign a status category: To Do, In Progress, or Done. Click Save.
- Add transitions — Click between status nodes to draw a transition arrow. In the transition panel, set who can trigger the transition and whether any fields are required before the task can move. Click Save changes.
- Publish workflow — Click Publish at the top right. Unpublished changes do not appear on the Board or List views until published.
Adding Custom Fields
- Project Settings > Issue types — Click Issue types in Project Settings, then select the issue type you want to modify (usually “Task”).
- Add a field — On the issue type screen, click Add field in the right panel. Search for existing fields (e.g., “Department,” “Budget Code,” “Contract Value”) or click Create a field to build a new one.
- Field type selection — Choose the appropriate field type: Short text, Number, Date picker, Single select (dropdown), Multi select, or User picker. Single select is the correct choice for any field that needs reporting — it groups values consistently. Free text fields cannot be aggregated in reports.
- Drag to position — Drag the new field into the desired position on the issue layout. Fields above the divider line appear in the primary issue view; fields below appear in a collapsed “Details” section.
- Save — Click Save** at the top right. The field is now visible on all tasks of that issue type within this project.
Setting Up the Form View for Intake and Request Management
The Form view is JWM’s most underused feature and the one with the highest immediate business value. A properly configured intake form eliminates the email chain, the Slack DM, and the spreadsheet tracker that most business teams use to collect requests. When someone submits a form, JWM creates a task automatically — pre-populated with the submitted data, assigned to the right person, and placed at the correct workflow stage.
- Forms tab (left sidebar) — In your JWM project, click Forms in the left sidebar. If Forms does not appear, go to Project settings > Features and toggle Forms to enabled.
- Create form — Click Create form. Enter a name that your submitters will recognize — for example, “New Contract Review Request” or “IT Equipment Request.” This name appears in the browser tab when someone opens the form link.
- Add form fields — Click Add field to pull in fields from your project’s issue type. You can add any custom field you created earlier, plus standard fields like Summary, Description, Priority, and Due Date. Reorder fields by dragging. Mark fields as Required by toggling the requirement slider on each field.
- Form settings — Click the gear icon in the form builder to configure: Issue type (which task type the form creates), Default assignee (who receives all submissions), and Status on submission (which workflow stage the task starts at — typically “Submitted” or “Received”).
- Publish and share — Click Publish form. JWM generates a shareable URL. Copy this URL and distribute it via email, your intranet, or Confluence. No Jira account is required to submit.
- Test the form — Open the URL in an incognito browser window and submit a test entry. Confirm the task appears in your project’s Board view at the correct status with all fields populated.
For teams managing high-volume intake, combine the Form view with Jira automation rules to auto-assign submissions by department, send confirmation emails to submitters, and escalate tasks that have not been acknowledged within 24 hours.
JWM Templates by Team: HR, Finance, Legal, Marketing, and Operations
Atlassian’s JWM templates are well-designed starting points, but each team type needs specific customizations to make the workflow match real-world processes.
HR Teams: Onboarding and Lifecycle Management
Start with the HR Onboarding template. Add custom fields for: Start Date, Department, Hiring Manager (User picker), Equipment Needed (Multi select), and System Access Required (Multi select). The default workflow covers the basics; extend it with an “IT Provisioned” status so HR can track hardware delivery independently of the main onboarding checklist. Use the Calendar view to track start dates across the month.
Finance and Legal Teams: Approval Pipelines
Start with the Legal Project template for contract work or the blank Business template for budget processes. The most important customization for these teams is a multi-stage approval workflow: Draft > Under Review > Legal Approved > Finance Approved > Executed. Add a “Contract Value” number field and a “Counterparty” text field. Legal teams should use the List view as their primary view — it supports bulk status changes and makes audit trail review fast.
Marketing Teams: Campaign and Content Management
Start with the Marketing Campaign template. Extend it with custom fields for: Channel (Multi select: Email, Paid Social, Organic, PR, Events), Campaign Owner (User picker), Launch Date (Date picker), and Budget Allocated (Number). Use the Timeline view for campaign scheduling and the Calendar view for content publication dates. Marketing teams benefit most from JWM’s Calendar view, which maps directly to editorial calendar workflows that most marketing managers already understand.
Operations Teams: Cross-Functional Projects
Start with the Operations template. Operations teams typically manage work that touches multiple departments, making the cross-project linking to Jira Software particularly valuable. Add a “Impacted Teams” multi-select field and a “Stakeholder” user-picker field. Use the Timeline view for project scheduling and link JWM tasks to Jira Software epics when operations work is a dependency for engineering deliverables.
Atlassian Intelligence Features in JWM 2026
Atlassian Intelligence (AI) is the umbrella brand for Atlassian’s AI features across Jira, Confluence, and related products. In JWM specifically, the 2025-2026 updates have delivered four AI capabilities that are genuinely useful rather than cosmetic:
AI Task Summaries
On any JWM task with comments and history, the AI Summary button (the sparkle icon in the top right of the issue detail panel) generates a plain-English summary of the task’s current state, recent activity, and any blockers mentioned in comments. This is the single feature I recommend most to managers who oversee 20+ tasks at once — it replaces the “quick update?” Slack message.
Smart Field Suggestions
When creating a new task, Atlassian Intelligence analyzes the task title and description to suggest values for Priority, Assignee, and custom fields. The suggestions are probabilistic — they learn from your project’s historical data — and accuracy improves significantly after the first 50-100 tasks. On a mature Marketing team’s project, field suggestion accuracy typically exceeds 80% for Priority and Assignee.
Auto-Generated Status Updates
For project managers who write weekly status reports, JWM’s AI status update generator (available from the project Summary page) drafts a structured status report based on task completion rates, overdue items, and recent comments. It outputs a formatted text block you can paste directly into Confluence or send by email. It is not perfect, but it reduces a 30-minute task to a 5-minute review-and-edit.
Enabling Atlassian Intelligence in JWM
- Admin Console (gear icon, top right) — Go to Jira Settings by clicking the gear icon in the top navigation bar, then select Products from the admin menu.
- Atlassian Intelligence settings — Scroll to the Atlassian Intelligence section and confirm the toggle is set to Enabled. If it is greyed out, your organization is on a Free or Standard plan — AI features require Premium or Enterprise.
- Data residency check — If your organization has data residency restrictions (EU data residency, for example), confirm that Atlassian Intelligence is compliant with your residency policy before enabling. The admin panel displays your current data residency setting.
- User opt-in — Individual users must accept the AI terms in their personal settings before AI features activate for their account. Direct team members to Profile > Personal settings > Atlassian Intelligence and have them toggle it on.
Native Integrations: Confluence, Jira Software, and Automation
JWM’s value increases significantly when it operates as part of the broader Atlassian ecosystem rather than as a standalone product. Three integrations deserve specific attention:
Confluence Integration
Every JWM project can be linked to a Confluence space, creating a bidirectional connection between task management and documentation. From any JWM task, click the Link button and select Confluence page to attach meeting notes, specifications, or approval documentation directly to the task. From Confluence, the Jira Issues macro renders a live list of JWM tasks on any page — useful for project pages that need real-time status without manually updating a table.
Jira Software Cross-Project Linking
When business teams and engineering teams share dependencies, JWM and Jira Software can link issues across projects using the standard Link function on any issue. Select the link type (e.g., “is blocked by” or “relates to”), then search for the Jira Software issue by key or title. The linked issues appear in both projects’ issue detail panels, giving both teams visibility without giving business users access to the full Jira Software board. For cross-team roadmap planning, see our guide on Jira Plans and Advanced Roadmaps.
Jira Automation for Business Workflows
JWM supports the full Jira automation rule engine. The most impactful rules for business teams are:
- Auto-assign on submission: When a form submission creates a task, assign it to the team member responsible for that request type based on a field value (e.g., route Legal requests to the Legal inbox, IT requests to the IT team).
- Due date escalation: When a task’s due date is within 48 hours and the status is not “Done,” send a Slack or email notification to the assignee and their manager.
- Status-based notifications: When a task transitions to “Awaiting Approval,” notify the designated approver with a direct link to the task.
Our complete guide to Jira automation rules setup in 2026 covers the rule builder in full detail, including conditional logic and cross-project triggers.
For a consolidated view of JWM project progress alongside other Jira projects, Jira custom dashboards can surface JWM-specific gadgets — including task completion rates, overdue task counts, and workload by assignee — on a shared team dashboard.
Permissions, Access Roles, and External Contributor Setup
JWM uses a simplified permission model compared to Jira Software, but it still requires deliberate configuration. The three most common permission mistakes are: giving everyone Project Admin access “to keep things simple,” making projects public when they contain sensitive HR or Finance data, and not distinguishing between people who need to submit requests (form-only access) versus people who need to manage tasks (project member access).
JWM Permission Roles
- Project Admin — Full control: can edit project settings, workflows, fields, and permissions. Limit this to 1-2 people per project.
- Member — Can create, edit, and transition tasks. This is the correct role for most active team members.
- Viewer — Read-only access to the project. Use for stakeholders who need progress visibility without edit rights.
Adding Team Members to a JWM Project
- Project settings > Access — In your JWM project, click Project settings then Access from the settings menu.
- Add members — Click Add members in the top right. Search for users by name or email address.
- Assign role — In the role dropdown next to each added user, select the appropriate role: Project Admin, Member, or Viewer. Click Add.
- Project access level — Set the overall project access to Private (visible only to added members) for HR, Finance, and Legal projects. Use Limited (visible to all logged-in users in your organization but not editable) only for projects where broad visibility is appropriate, such as a company-wide OKR tracking project.
External Contributors via Form View
If your goal is to collect requests from external parties — vendors, clients, job applicants — the Form view’s public URL does not require a Jira account. Submitters interact only with the form; they never see the project itself. This is the correct approach for external intake. Do not grant external parties direct project access unless they are contractors who actively manage tasks.
For organizations managing multiple JWM projects with complex permission hierarchies, the official Atlassian documentation on Jira project roles and permissions provides the complete reference. The Atlassian JWM resource hub also includes video walkthroughs for each view type.
Jira Work Management is the right choice for any business team operating within an Atlassian-first organization, or any team that needs structured workflows, intake forms, and a timeline view without the complexity of Jira Software. The 2025-2026 AI features — task summaries, smart field suggestions, and auto-generated status reports — are genuinely useful rather than marketing window dressing. The product earns its place on Premium plans for teams of 10 or more. For smaller teams or those without an existing Jira subscription, the Free tier supports up to 10 users and covers the core workflow and form features. The one clear limitation: JWM still lacks native sprint planning and velocity tracking, so hybrid teams that need both business and engineering workflows should plan for a JWM plus Jira Software architecture from the start.
Related guides
Frequently Asked Questions
Is Jira Work Management included in my Jira Software subscription?
Yes, if you have a Jira Software Cloud subscription, JWM project creation is included at no additional cost. Jira Software users can create both Software and Business (JWM) projects from the same instance. Atlassian Intelligence AI features in JWM require a Jira Premium or Enterprise plan, regardless of whether you are using JWM standalone or alongside Jira Software.
Can non-technical users learn Jira Work Management without training?
Most business users can navigate the Board, List, and Calendar views within 30 minutes with no formal training — the interfaces are comparable to Trello or a spreadsheet. The Timeline view has a steeper learning curve, particularly around dependency arrows and date configuration. The Form view requires zero training for submitters; it is just a web form. I recommend a 30-minute live walkthrough for new project members that covers how to transition tasks, how to add comments, and how to find their assigned work — those three actions cover 90% of daily use for most business users.
What is the difference between JWM’s Board view and a Jira Software Kanban board?
JWM’s Board view and Jira Software’s Kanban board are visually similar but functionally different. JWM’s Board does not support swimlanes, WIP limits, or backlog sections — it is a simple status-column view of all active tasks. Jira Software’s Kanban board supports WIP limits, swimlanes by assignee or epic, and a managed backlog. For business teams, JWM’s Board is sufficient and less visually complex. For teams that need WIP limit enforcement or backlog management, Jira Software’s Kanban board is the correct tool.
Can a JWM project be converted to a Jira Software project if our team’s needs change?
There is no one-click conversion between JWM and Jira Software project types in Jira Cloud. If your team’s needs evolve to require sprints or release management, the practical approach is to create a new Jira Software project and bulk-move tasks from the JWM project using the Move issue function (available on individual tasks or in bulk from the List view). Workflows, custom fields, and form configurations do not transfer automatically. This migration takes a few hours for most teams but is straightforward. Plan for it from the start if there is any likelihood your team will adopt agile ceremonies.
How many JWM projects can one Jira Cloud instance support?
There is no hard cap on the number of JWM projects in a Jira Cloud instance. In practice, performance and governance become challenges at scale — organizations with 50+ JWM projects often encounter field sprawl (hundreds of redundant custom fields), permission inconsistencies, and navigation complexity. Atlassian recommends using a consistent naming convention, a project catalog Confluence page, and a designated Jira administrator to audit project health quarterly. For large organizations, the Jira Premium tier’s Advanced Roadmaps and cross-project reporting features become essential for making sense of work across many projects simultaneously.
Sponsored