How to Set Up Monday.com Time Tracking in 2026: Log Hours, Set Budgets & Generate Reports
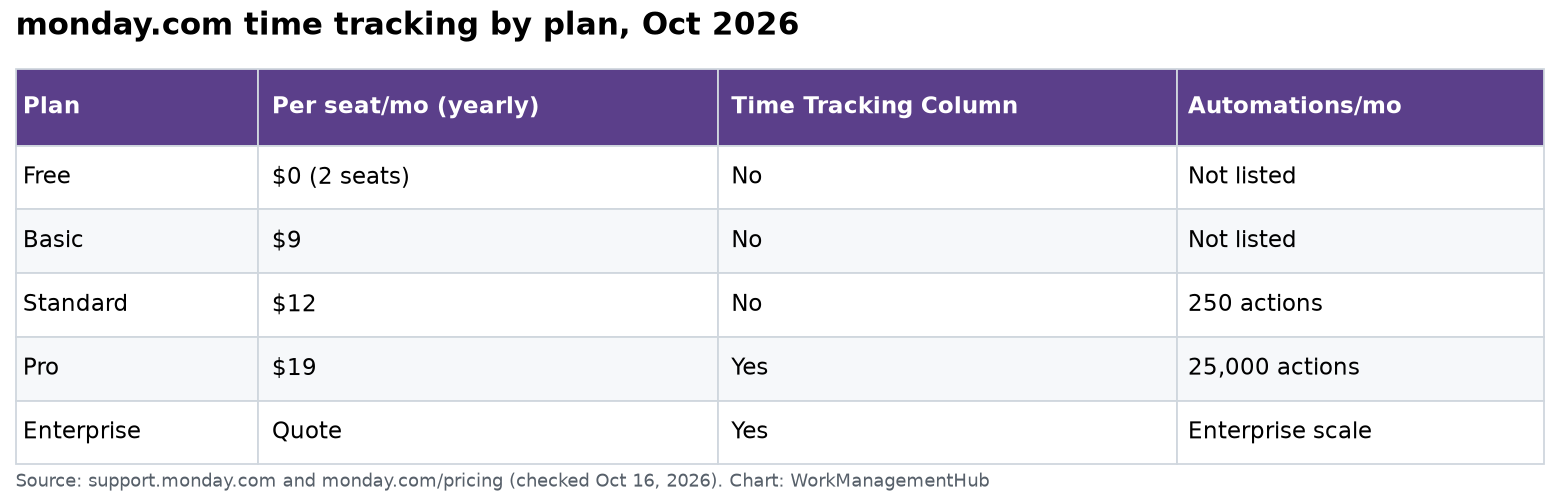
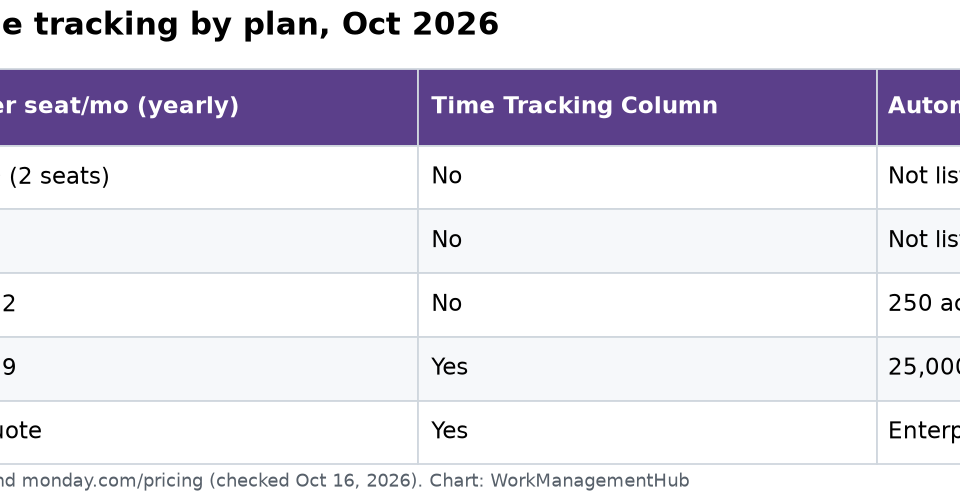
- Monday.com has a native Time Tracking column that works on any board across all paid plans — you do not need a third-party integration to start logging hours today.
- The start/stop timer runs in the browser and the mobile app, meaning field teams and remote workers can log time on any device without a separate app installed.
- Time data only surfaces in dashboards through the dedicated Time Tracking widget — it will not appear in any other chart or summary widget, a common source of confusion during initial setup.
- Third-party integrations with Toggl, Harvest, and Clockify sync time logs bidirectionally, but each requires its own OAuth connection configured per workspace — one connection does not cover all boards.
- In 2026, Monday.com Autopilot can generate AI-powered time estimates for new tasks based on historical time logs, eliminating the blank-column problem on project kickoff.
- Monday.com has no native payroll engine — for billing and payroll exports, the QuickBooks integration or a CSV export workflow is the recommended path.
To set up Monday.com time tracking, add a Time Tracking column to any board, click the timer icon on a task row to start logging, or type a manual entry. Connect the Time Tracking widget to a dashboard to generate reports. For third-party sync, install Toggl, Harvest, or Clockify from the Monday.com apps marketplace and authenticate via OAuth.
- Why Monday.com Time Tracking Is Worth Setting Up Properly
- How to Add the Native Time Tracking Column to Any Board
- Logging Hours: Start/Stop Timer vs. Manual Entry
- Using Monday.com Time Tracking on Mobile
- Connecting Toggl, Harvest, and Clockify via the Apps Marketplace
- Building Time Tracking Dashboards and Reports
- Setting Up Budget Tracking Against Time Logged
- AI-Powered Time Estimates with Monday.com Autopilot in 2026
- Exporting Time Data to QuickBooks and Payroll Systems
- Common Monday.com Time Tracking Mistakes and Exact Fixes
- Verdict
- Frequently Asked Questions
How to Set Up Monday.com Time Tracking in 2026: Log Hours, Set Budgets & Generate Reports
Most teams using Monday.com have a time data problem that masquerades as a communication problem. A client asks why a deliverable cost twice as much as estimated. A project manager cannot explain where the budget went. A team lead suspects certain task types are chronically underestimated but has no numbers to prove it. None of these are people problems — they are data problems, and Monday.com time tracking is designed to solve them directly.
The platform ships with a native Time Tracking column that is genuinely capable for most teams: start/stop timers that work on desktop and mobile, manual entry for past hours, and a dashboard widget that aggregates time data across projects. For teams already using Toggl, Harvest, or Clockify, bidirectional sync via the apps marketplace means you do not have to abandon existing tools or force a workflow change on your team. And in 2026, Monday.com Autopilot adds AI-generated time estimates based on your historical logs — which solves the blank-column problem that makes planning estimates feel like guesswork on every new project.
This guide covers every layer of Monday.com time tracking: native setup, third-party integrations, dashboard reporting, budget tracking, AI estimates, and payroll export. By the end, you will have a complete time logging system configured and ready to use.
Why Monday.com Time Tracking Is Worth Setting Up Properly
Time tracking is one of those features that teams implement superficially and then wonder why it is not generating useful data. They add the column, forget to enforce logging discipline, and three months later pull a report to find that half the tasks have zero time logged and the other half have single large manual entries added at end of sprint. That data tells you nothing about where time actually went.
A properly configured time tracking system inside Monday.com delivers three business outcomes that justify the setup investment:
- Accurate client billing: For agencies, consulting firms, and professional services teams, logged hours directly equal revenue. Untracked time is unbilled time. Even a single hour per person per week that goes unlogged, across a ten-person team, compounds to 520 hours of unbilled work per year — which at a $150 blended rate is $78,000 in lost billing annually.
- Better project estimates: Historical time logs are the most reliable input for future estimates. When you can show that design review cycles average 6.4 hours across 50 previous projects, your next estimate has a defensible basis. Without logs, you are guessing — and those guesses systematically underestimate by 20 to 40% based on well-documented planning fallacy research.
- Operational insight: Time data reveals where work is actually going. Many teams discover in their first month of real tracking that a category of work they assumed was minor — client revision requests, internal meetings, QA back-and-forth — is consuming 30 to 40% of available hours. That insight drives staffing decisions, process changes, and pricing conversations that have nothing to do with project management software and everything to do with business sustainability.
Monday.com time tracking infrastructure is capable of generating all three outcomes if it is set up correctly. The gap between capable software and useful data is almost always team habit and correct configuration — not a missing feature.
For context on how time tracking connects to resource allocation decisions, see our guide on Monday.com workload management setup in 2026 — the two systems work best when configured together, with time logs feeding back into capacity planning.
How to Add the Native Time Tracking Column to Any Board
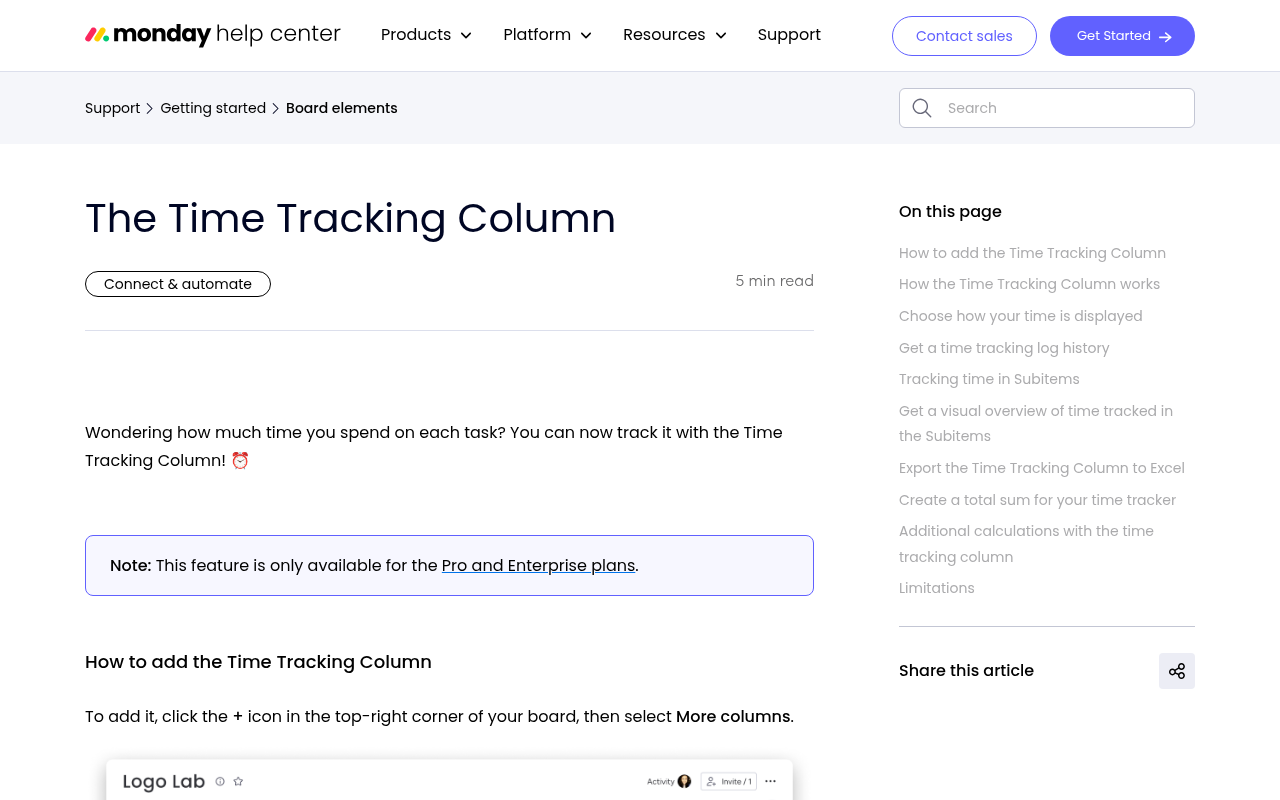
The native Time Tracking column is available on all Monday.com paid plans — Basic, Standard, Pro, and Enterprise. It can be added to any board in any workspace. Here is the exact sequence.
- Open the target board — Navigate to the board where your team manages the tasks you want to track time against. This can be a project board, a client board, a sprint board, or any other board type. The column type is not board-specific.
- Click the “+” button at the end of the column header row — Scroll to the right of your existing columns until you see the plus icon in the header row. Clicking it opens the column type picker. Do not click the “+” icon that appears within a group row — that adds a new item, not a column.
- Search for “Time Tracking” in the column picker search field — Type “time” in the search bar at the top of the column picker. The Time Tracking column type will appear in the results under the “Time” category.
- Click “Time Tracking” to add it to your board — The column is added immediately to the right of your last column. A small timer icon appears in every item row under the new column header.
- Double-click the column header to rename it — The default name is “Time Tracking” which works fine for most boards. If you are running multiple time tracking columns — for example, one for billable hours and one for internal time — rename them clearly: “Billable Hours” and “Internal Time” rather than “Time Tracking” and “Time Tracking 2.”
- Drag the column to a preferred position in the header row — Click and hold the column header and drag it left to position it near the People and Status columns where it is most visible during daily task management.
One column covers all time tracking needs for most single-project boards. For agencies tracking billable versus non-billable time on the same project, add two Time Tracking columns — one for each category. This is more reliable than trying to tag individual time entries as billable or non-billable, since the Monday.com native column does not yet support entry-level billing flags as of 2026 without a third-party integration.
According to the Monday.com Time Tracking Column documentation, the column supports multiple simultaneous users running timers on the same item — useful for collaborative tasks where two team members are genuinely working in parallel and both need their time logged against the same deliverable.
Logging Hours: Start/Stop Timer vs. Manual Entry
Monday.com Time Tracking column supports two logging methods: the real-time start/stop timer and manual entry for past periods. Both write to the same column and aggregate identically in reports. The right method depends on your team’s work style.
Using the Start/Stop Timer
- Locate the timer icon in the Time Tracking column on the target row — Each item row shows a small play-button icon in the Time Tracking column cell. This is the timer control.
- Click the play icon to start the timer — The icon changes to a stop icon (square) and the cell begins showing elapsed time in real time. The timer runs in your browser session — it is not a background process, so if you close the tab without stopping the timer, Monday.com will continue counting until you stop it on return or on another device.
- Work on the task, then click the stop icon to end the session — The elapsed time for that session is added to the column’s total for that item. You can see the session log by clicking the time value in the cell.
- Click the time value to view the session breakdown log — A popup shows each individual session: who ran it, start time, end time, and duration. This granular log is what feeds the Time Tracking dashboard widget and is what you reference during invoice reconciliation or client queries.
The timer is the most accurate method and the one I recommend enforcing as the default for any team doing client billing. It eliminates the “I think I spent about four hours on that” problem that plagues manual-entry-only workflows.
Logging Time Manually
- Click the Time Tracking cell for the target item — This opens the time entry popup for that item.
- Click “Add manually” or the pencil icon within the popup — A form appears allowing you to enter a time range or a duration directly.
- Enter the start date, start time, end time (or duration), and optionally a note — The note field is useful for describing what was done during the logged period, which aids invoice descriptions and client-facing reporting.
- Click “Add” to save the manual entry — It is added to the session log alongside any timer-based entries and is visually identical — there is no flag distinguishing manual from timer-based entries in the current 2026 interface.
Manual entry is appropriate for time that genuinely cannot be tracked live — field work logged at end of day, retrospective logging of work done before the column was added, or time spent in locations without reliable internet. It is not appropriate as the primary method for an entire team because retrospective estimates are systematically less accurate than real-time tracking. If your team is resistant to running timers during work, start by requiring timer use for client-billable tasks only, and let internal tasks be manually logged — this hybrid approach typically achieves 80% of the accuracy benefit with significantly lower adoption friction.
Using Monday.com Time Tracking on Mobile
The Monday.com mobile app for iOS and Android supports the full time tracking functionality, including the start/stop timer. This is directly relevant for field service teams, construction crews, on-site consultants, and anyone whose billable work happens away from a desk.
- Open the Monday.com app on your iOS or Android device — Ensure you are running the latest version; time tracking UI improvements in 2026 require the updated app. Check the App Store or Google Play for pending updates before troubleshooting missing features.
- Navigate to the board and find the target item — Use the bottom navigation to reach your workspace, then the board, then scroll to the relevant item or use the search function.
- Tap the item to open its detail view — The item detail panel shows all column values for that row, including the Time Tracking column.
- Tap the Time Tracking field within the item detail view — This opens the time tracking interface for that item, showing the current total, session log, and the play button to start the timer.
- Tap the play button to start the timer — A running timer indicator appears. The timer continues even if you navigate away from the item within the app, but will stop if you close the app completely on some device configurations.
- Tap the stop button when finished, then add a note if needed — The session is saved immediately and syncs to the web version of the board in real time, assuming the device has an active internet connection.
For teams where mobile tracking is the primary workflow, I recommend establishing a clear protocol: start the timer when arriving at a site or beginning a task, stop it during any breaks exceeding fifteen minutes, and add a one-sentence note before submitting. This note discipline takes fifteen seconds per session and saves hours of invoice dispute resolution per month.
Connecting Toggl, Harvest, and Clockify via the Apps Marketplace
If your team already uses a dedicated time tracking tool — particularly Toggl Track, Harvest, or Clockify — Monday.com apps marketplace provides native integrations that sync time data bidirectionally. Your team continues using the time tracking interface they already know while the data appears in Monday.com boards and dashboards without manual re-entry.
The integrations are installed and configured at the workspace level but must be connected per-board. A single Toggl OAuth connection does not automatically link all your boards — each board requiring time sync needs its own connection configured.
Installing a Time Tracking Integration
- Click the main menu (grid/waffle icon) in the top-left of the Monday.com interface — This opens the main navigation panel.
- Click “Apps Marketplace” from the left navigation or main menu options — This opens the Monday.com apps marketplace in a new panel.
- Search for your time tracking tool by name — Type “Toggl,” “Harvest,” or “Clockify” in the marketplace search bar. The official integration app for each will appear in results.
- Click the integration app, then click “Add to your account” or “Install” — Review the permission scopes the integration requires before confirming. Each integration requests read/write access to your time entries in the third-party tool and to specific Monday.com board data.
- Complete the OAuth authentication flow for the third-party tool — You will be redirected to log in to Toggl, Harvest, or Clockify and authorize the connection. Use the account credentials for the workspace-level account, not a personal account, if your team uses shared workspaces in those tools.
- Return to Monday.com and navigate to the target board — After authentication, you will be prompted to configure the mapping between the external tool’s projects and your Monday.com boards.
- Map external projects or clients to Monday.com boards and items — In the integration configuration panel, assign which Toggl project (or Harvest client, or Clockify project) corresponds to which Monday.com board. This mapping determines where time entries logged in the external tool appear in Monday.com.
- Set the sync frequency or enable real-time sync if available — Toggl and Harvest integrations as of 2026 support near-real-time sync via webhooks. Clockify sync may operate on a periodic pull schedule depending on your account tier in that tool.
A comparison of what each integration supports in 2026:
| Tool | Sync Direction | Entry-Level Notes | Monday.com Column Support |
|---|---|---|---|
| Toggl Track | Bidirectional | Yes — syncs description field | Time Tracking column + Numbers |
| Harvest | Bidirectional | Yes — syncs notes field | Time Tracking column + Numbers |
| Clockify | Bidirectional | Partial — description sync varies | Time Tracking column |
Per the Monday.com integrations documentation, each integration connection is scoped to the authenticated user account in the external tool. For team-wide sync, each team member may need to authenticate individually within the integration settings, or your organization must use a shared service account in the external tool that holds time entries for all team members.
For teams evaluating Monday.com broader integration ecosystem and automation capabilities alongside time tracking, our guide on Monday.com automations in 2026 covers how to build triggers that respond to time thresholds — for example, automatically notifying a project manager when logged hours on a task exceed the estimated budget.
Building Monday.com Time Tracking Dashboards and Reports
Time data sitting in a board column is operationally useful but analytically invisible. The Time Tracking widget on Monday.com dashboards is the only native way to aggregate, filter, and visualize time logs across items, groups, boards, and team members. Understanding exactly how this widget works — and its current limitations — determines whether your reporting setup meets business needs or requires a workaround.
Adding the Time Tracking Widget to a Dashboard
- Navigate to or create the dashboard where time reporting should live — From the left navigation, click the dashboard you want to modify, or create a new one by clicking the “+” next to “Dashboards” in the left panel and selecting “New Dashboard.”
- Click “Add Widget” in the top-right of the dashboard — The widget picker opens, showing all available widget types.
- Search for “Time Tracking” in the widget search field — The Time Tracking widget appears in results under the “Time” or “Productivity” category. Note: the Numbers widget and Chart widget cannot display Time Tracking column data — only the dedicated Time Tracking widget reads this column type.
- Click “Add to Dashboard” — The widget is added to the dashboard canvas in a default size and configuration.
- Click the widget settings icon (gear) to configure the data source — Select which board or boards supply time data to this widget. You can connect multiple boards, which is the key feature for cross-project time reporting.
- Select the Time Tracking column from your board(s) — The widget requires you to explicitly select the Time Tracking column from each connected board. If you have multiple Time Tracking columns on a board, select the one relevant to this report or add two widgets — one per column.
- Apply filters to scope the data — Use the filter panel to limit the widget to specific groups, people, date ranges, or status values. For a client-facing time report, filter to the relevant project group and the current billing period date range.
- Switch between widget views: Summary, by Person, or by Item — The Time Tracking widget offers multiple display modes. Summary shows total hours for the filtered data. By Person shows hours per team member. By Item shows hours per task. Use these views for different audiences: summary for client reports, by person for team capacity discussions, by item for project post-mortems.
Exporting Time Reports
- In the Time Tracking widget, click the three-dot menu (ellipsis) in the widget header — This opens the widget action menu.
- Click “Export” or “Download as CSV” — A CSV file is generated containing all time entries for the current widget filter scope, including session start/end times, team member names, item names, and durations.
- Open the CSV in Excel or Google Sheets for further analysis or client delivery — The raw export contains individual session rows. For client invoices, you will typically want to aggregate by item or by person using a pivot table before sending.
For teams needing deeper reporting than the native widget provides — trend analysis over multiple months, comparison across multiple clients, or automated scheduled reports — the recommended path is to connect Monday.com to a BI tool via the Monday.com API or use a third-party integration tool like Make (formerly Integromat) to push time data to Google Sheets on a scheduled basis.
Setting Up Budget Tracking Against Time Logged
Tracking hours is only half the picture. Understanding those hours as a percentage of a project budget — and knowing when you are approaching the limit — is where time tracking delivers its highest business value. Monday.com does not have a native budget-versus-actuals module, but combining the Time Tracking column with a Formula column and a Numbers column creates a functional budget tracking system without leaving the platform.
Building a Budget vs. Actual Hours Setup
- Add a Numbers column to your board named “Budget Hours” — Click the “+” in the column header row, select Numbers, and name it “Budget Hours.” This column holds the approved time budget for each task or project phase.
- Enter budget values for each item or group header row — For project-level tracking, enter budget hours at the group summary level. For task-level tracking, enter the per-task estimate in each item row.
- Add a Formula column named “Hours Remaining” — Click “+” and select Formula. Enter the formula referencing your Budget Hours column minus your Time Tracking column. Note that the Time Tracking column returns its value in hours as a decimal number, so a session of 1 hour 30 minutes returns 1.5.
- Add a second Formula column named “Budget Used %” — Enter a formula dividing logged time by budget hours and multiplying by 100. This gives you a percentage of budget consumed per item.
- Set up automations based on budget consumption thresholds — Set an automation rule: when Budget Used % exceeds 80, change Status to “At Risk.” When it exceeds 100, change Status to “Over Budget.” This creates a visual alert system that does not require anyone to look at the formula columns to spot a problem.
For automation configuration details, including how to set conditions based on column values and trigger notifications to specific people or Slack channels, see our guide on Monday.com automations setup in 2026.
For client-retainer models where budget is tracked in dollars rather than hours, add a third Numbers column for your billable rate per person and use a formula to calculate the dollar value of logged time. This gives you real-time billable revenue tracking at the task level, which is genuinely useful for agency account managers reviewing project profitability before invoicing.
AI-Powered Time Estimates with Monday.com Autopilot in 2026
One of the most practically useful additions to Monday.com in 2026 is AI-powered time estimation via Autopilot. When Autopilot is enabled and your board has at least a few weeks of time log history, it can suggest estimated hours for new tasks based on the historical time patterns for similar work — eliminating the blank-estimate problem that causes project plans to slip from day one.
This capability is part of the broader Monday.com AI Blocks ecosystem. For a complete overview of what AI Blocks can do across your workspace, see our guide on Monday.com AI Blocks in 2026.
Enabling AI Time Estimates via Autopilot
- Navigate to the Autopilot Hub from the main left navigation panel — Autopilot is available on Pro and Enterprise plans. If you do not see it in navigation, your plan does not include it.
- Click “New Autopilot” or “Create Automation” within the Autopilot Hub — This opens the Autopilot configuration interface, which uses a natural-language or visual builder depending on your account setup.
- Select “Suggest time estimates for new items” from the Autopilot template library — This template pre-configures the AI to analyze your board existing time log data and generate estimates when new items are added.
- Connect the Autopilot to your board and select the Time Tracking column and the Budget Hours column — The AI reads historical time logs from the Time Tracking column and writes suggested estimates to the Budget Hours or Estimated Hours column on new items.
- Set the confidence threshold for auto-fill versus suggestion — At high confidence, the AI populates the estimate column automatically. At lower confidence, it leaves a suggestion for human review. For new boards with limited history, keep the threshold at “suggestion only” and move to auto-fill after 30 to 60 days of accumulated data.
- Click “Enable” to activate the Autopilot — From this point, new items added to the board will trigger the AI estimation process, which typically completes within seconds of item creation.
In practice, AI estimates are most accurate for task types your team does repeatedly — standard deliverables, routine review cycles, recurring meeting prep. They are least accurate for novel work or tasks with highly variable complexity. Treat AI estimates as a starting point for team review, not a final authority, particularly in the first months of use when the model is calibrating to your team actual performance patterns.
For a broader look at how AI agents within Monday.com can automate decision-making across your project workflows, our guide on setting up Monday.com AI agents in 2026 covers the full Autopilot capability set.
Exporting Time Data to QuickBooks and Payroll Systems
Monday.com has no native payroll module — it is a work operating system, not an HR platform. But for teams billing clients based on logged hours, or processing contractor payments tied to time records, the QuickBooks integration provides a functional bridge that covers the most common use cases without requiring custom development.
Connecting Monday.com to QuickBooks Online
- Open the Monday.com Apps Marketplace from the main menu — Navigate to Apps Marketplace as described in the integrations section above.
- Search for “QuickBooks” and select the official QuickBooks Online integration — Monday.com maintains an official integration with QuickBooks Online. QuickBooks Desktop is not supported via the native integration as of 2026 — that path requires third-party middleware.
- Click “Add to account” and complete the QuickBooks OAuth authentication — Use the QuickBooks account credentials for the company file where client invoices and time billing are managed.
- Configure the field mapping between Monday.com columns and QuickBooks fields — Map your Monday.com “Client” column to the QuickBooks Customer field, the Time Tracking column to QuickBooks Time entries, and the Billable Rate column to the QuickBooks billing rate field if applicable.
- Set the sync trigger — The integration can push time data to QuickBooks on a schedule (daily, weekly) or when a Monday.com status column is changed to a specific value such as “Approved for Billing.” The status-triggered option gives finance teams control over when data moves, which is preferable for most organizations with an invoice approval workflow.
- Test with a single item before enabling for the full board — Change one item status to trigger the sync and verify the QuickBooks entry appears correctly before enabling the automation for all board items.
For teams not using QuickBooks, the CSV export from the Time Tracking widget is the most reliable path to any other payroll or billing system. Export weekly, open in Excel, add a billable rate column, and generate a summary. It is a manual step but takes under ten minutes per billing cycle for most teams and requires no additional integration configuration.
Common Monday.com Time Tracking Mistakes and Exact Fixes
These are the issues I encounter most consistently when auditing time tracking setups for consulting clients. Each one is fixable in under five minutes once identified.
Mistake 1: Using a Numbers Column Instead of the Time Tracking Column
Teams often add a Numbers column named “Hours” and have team members type hour totals instead of using the dedicated Time Tracking column. This looks similar at the board level but produces data that cannot be displayed in the Time Tracking widget and has no session-level breakdown. Fix: add the correct Time Tracking column type, migrate historical data via manual entry into the new column, and remove or archive the Numbers column to avoid future confusion.
Mistake 2: Leaving Timers Running Overnight
The start/stop timer does not automatically stop at end of business. Team members who forget to stop a timer before closing their laptop will see multi-hour or multi-day sessions in their log that inflate reported time and skew estimates. Fix: set a Monday.com automation that sends a reminder to all team members at 5:30 PM on weekdays: “Check your time tracking — stop any running timers before logging off.” This automation uses the “Every day at time” trigger in the automations builder.
Mistake 3: Connecting the Dashboard Widget to Only One Board
Teams managing client work across multiple boards frequently miss time logged in other boards because the widget is only connected to one source. The Time Tracking widget supports multi-board connections — use this feature. Fix: open the widget settings, click “Connect board,” and add all boards contributing to the project or client report. Time entries from all boards will aggregate in the widget.
Mistake 4: Not Establishing a Note Standard for Manual Entries
Time entries without notes are billing liabilities. When a client queries an invoice line item, a time entry that says “4.5 hours” with no further description cannot be defended. Fix: establish a team standard that every manual time entry requires a minimum five-word description of what was done during that session. Include this in team onboarding documentation and in the daily reminder automation message.
Mistake 5: Assuming the Time Tracking Column Total Is in Whole Hours
The Time Tracking column returns decimal hours — 1 hour 30 minutes appears as 1.5, not as 1:30. When this value is used in Formula columns for budget calculations, teams often misread or misformat the result. Fix: in any Formula column referencing the Time Tracking column, add a note in the column description clarifying that the unit is decimal hours, not hours:minutes. This prevents the 1.5 versus 90 minutes confusion that breaks budget formulas silently.
Monday.com time tracking is genuinely capable for small to mid-sized teams — particularly agencies, consulting firms, and project-based businesses that need time data connected to the same system where work is managed. The native Time Tracking column handles the core logging workflow well, and the 2026 Autopilot AI estimates meaningfully reduce the estimation effort on new projects. The limitations are real but manageable: no native payroll, limited entry-level billing flags without third-party integration, and a dashboard widget that is the only path to aggregated reporting. If your team already uses Toggl or Harvest and is satisfied with those tools, keep them and use the sync integration — there is no reason to force a tool switch. If you are starting fresh or consolidating tools to reduce software spend, the native column is sufficient for most billing and reporting needs. Configure it properly — enforcing timer discipline, enabling budget tracking formulas, and connecting the Time Tracking widget correctly to your dashboards — and you will have a time management system that supports billing, planning, and operational decisions without adding another tool to your stack.
Frequently Asked Questions
Does Monday.com time tracking work offline?
The Monday.com mobile app supports limited offline functionality, but the Time Tracking timer requires an active internet connection to record sessions accurately. If you start a timer while connected and lose connection, the timer may not sync correctly when you come back online. For teams working in areas with unreliable connectivity, manual entry at end of day is the recommended approach — log the start and end time of your work session when you regain connectivity, using the manual entry interface described in this guide.
Can I track time across multiple boards in one report?
Yes — the Time Tracking widget on Monday.com dashboards supports multi-board connections, meaning you can aggregate time logged across all project boards for a single client or team into one view. To enable this, open the widget settings, click “Connect board,” and add each board that contains relevant time data. The widget will then display combined totals, per-person breakdowns, and per-item breakdowns across all connected boards. This is the correct path for agencies managing multiple simultaneous client projects.
Does Monday.com time tracking integrate with payroll software?
Monday.com does not have a native payroll module, but it integrates with QuickBooks Online via the official apps marketplace integration, which covers the most common use case of billing clients for tracked hours. For other payroll systems, the recommended path is to export time data as a CSV from the Time Tracking widget and import it into your payroll software manually. The CSV export includes session-level detail including team member names, start and end times, and durations, which is typically sufficient for payroll input.
What is the difference between the Time Tracking column and using a Numbers column for hours?
The Time Tracking column is a purpose-built column type with a built-in start/stop timer, session-level logging with timestamps, and dedicated dashboard widget support. A Numbers column can store a number you type representing hours, but it has no timer, no session history, and cannot be displayed in the Time Tracking dashboard widget. For any team doing real-time logging, client billing, or detailed reporting, the Time Tracking column is the correct choice. Use a Numbers column only as a budget or estimate field — not as a logging mechanism.
How accurate are Monday.com AI time estimates from Autopilot in 2026?
The Autopilot AI time estimates are most accurate for recurring task types where your team has at least four to six weeks of historical time log data — standard deliverables like design revisions, content drafts, or development sprints that your team executes repeatedly. For novel or highly variable work, accuracy is lower and human review of suggestions is important. Monday.com guidance recommends treating AI estimates as a starting baseline rather than a final figure, particularly in the first 60 to 90 days of use while the model calibrates to your team actual performance patterns. Over time, teams report that Autopilot estimates converge on actual logged time to within 10 to 15% for well-defined task types.
For more Monday.com configuration guides, see our coverage of Monday.com CRM and sales pipeline setup and the complete Monday.com workload management guide — both of which connect directly to the time tracking workflows covered here.