Skip to content
Work Management Hub Work Management Hub

Expert Reviews, Comparisons & Guides for Smartsheet, Monday.com, Asana, ClickUp & More

Work Management Hub Work Management Hub

Expert Reviews, Comparisons & Guides for Smartsheet, Monday.com, Asana, ClickUp & More

  • Airtable
  • Asana
  • ClickUp
  • Jira
  • Monday.com
  • Notion
  • Smartsheet
  • Wrike
  • About
  • Contact
  • Airtable
  • Asana
  • ClickUp
  • Jira
  • Monday.com
  • Notion
  • Smartsheet
  • Wrike
  • About
  • Contact
Close

Search

How-To GuidesWrike

How to Set Up Wrike Request Forms in 2026: Dynamic Fields, Conditional Logic & Blueprint Launch

By Khasim
July 4, 2026 12 Min Read
0
⚡ Key Takeaways

  • Basic Wrike request forms are available on the Team plan, but dynamic forms — conditional follow-up questions, conditional approvals, conditional status changes, and conditional Blueprint launch — require the Business plan ($25/user/month, 5-seat minimum, billed annually).
  • Wrike restructured its pricing in January 2026 into five tiers: Free, Team, Business, Pinnacle, and Apex. Enterprise is gone for new customers, so older plan-gating advice is now wrong.
  • Conditional Blueprint launch lets one form spin up completely different tasks or projects depending on a Single answer or Importance selection — one intake URL, many workflows.
  • When you edit a regular or database custom field, Wrike auto-syncs the matching request form options — additions, renames, reorders, and deletions all update without touching the form.
  • Space admins build forms under the space gear icon → Request Forms tab; account admins build account-level forms under Settings → Account management → Request forms.
  • Conditional follow-up questions run on page redirects, so structure your form into pages with page breaks before you wire up any branching.
Quick Answer:

To set up Wrike request forms, open your space settings → Request Forms tab → + Form, add questions, map responses to task or project fields, then attach a Blueprint and conditional logic in the question settings. Dynamic features require the Business plan ($25/user/month, 5-seat minimum) under Wrike’s January 2026 pricing.

Table of Contents

  1. What Wrike Request Forms Do — and Which 2026 Plan You Need
  2. How to Create Wrike Request Forms Step by Step
  3. Adding Dynamic Fields and Conditional Follow-Up Questions
  4. Conditional Blueprint Launch: One Form, Many Workflows
  5. Conditional Approvals, Status Changes, and Subtasks
  6. Custom Field Sync: The Maintenance Work You No Longer Do
  7. Five Wrike Request Forms Mistakes That Break Intake
  8. Frequently Asked Questions

Wrike request forms are the difference between an intake process and an inbox full of half-described favors. Done right, a single form URL replaces the Slack pings, hallway asks, and forwarded email chains that eat a PMO’s week — every request arrives with the fields your team actually needs, lands in the right folder, and launches from the right template. Done wrong, requesters abandon a 30-question monster and go right back to DMing your designers.

The problem with learning this from Wrike’s own documentation is fragmentation: form creation, conditional logic, Blueprint pairing, and plan gating live in at least six separate Help Center articles, and none of them reflect the January 2026 pricing restructure that replaced Enterprise with Pinnacle and Apex. This guide consolidates all of it — the exact clicks, the plan tiers, and the conditional-logic patterns I deploy for client teams — current as of July 2026.

What Wrike Request Forms Do — and Which 2026 Plan You Need

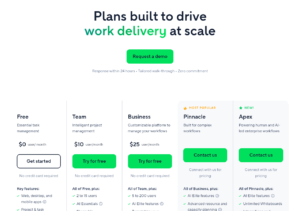
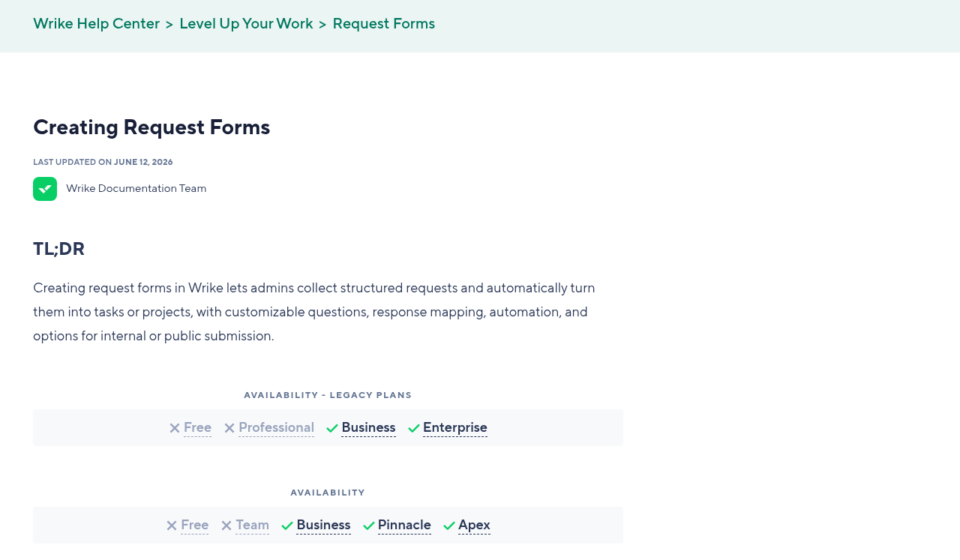
Start with the budget conversation, because it determines what you can actually build. In January 2026, Wrike restructured its lineup into five tiers — Free, Team, Business, Pinnacle, and Apex — retiring the old Enterprise plan for new customers (Apex effectively replaces it, layering in Wrike Integrate, Wrike Sync, and expanded Datahub and AI Elite quotas on top of Pinnacle). If you’re reading a 2024-era tutorial that says “Enterprise unlocks X,” it’s describing a plan you can no longer buy.

For request forms specifically, the line that matters is between Team and Business:

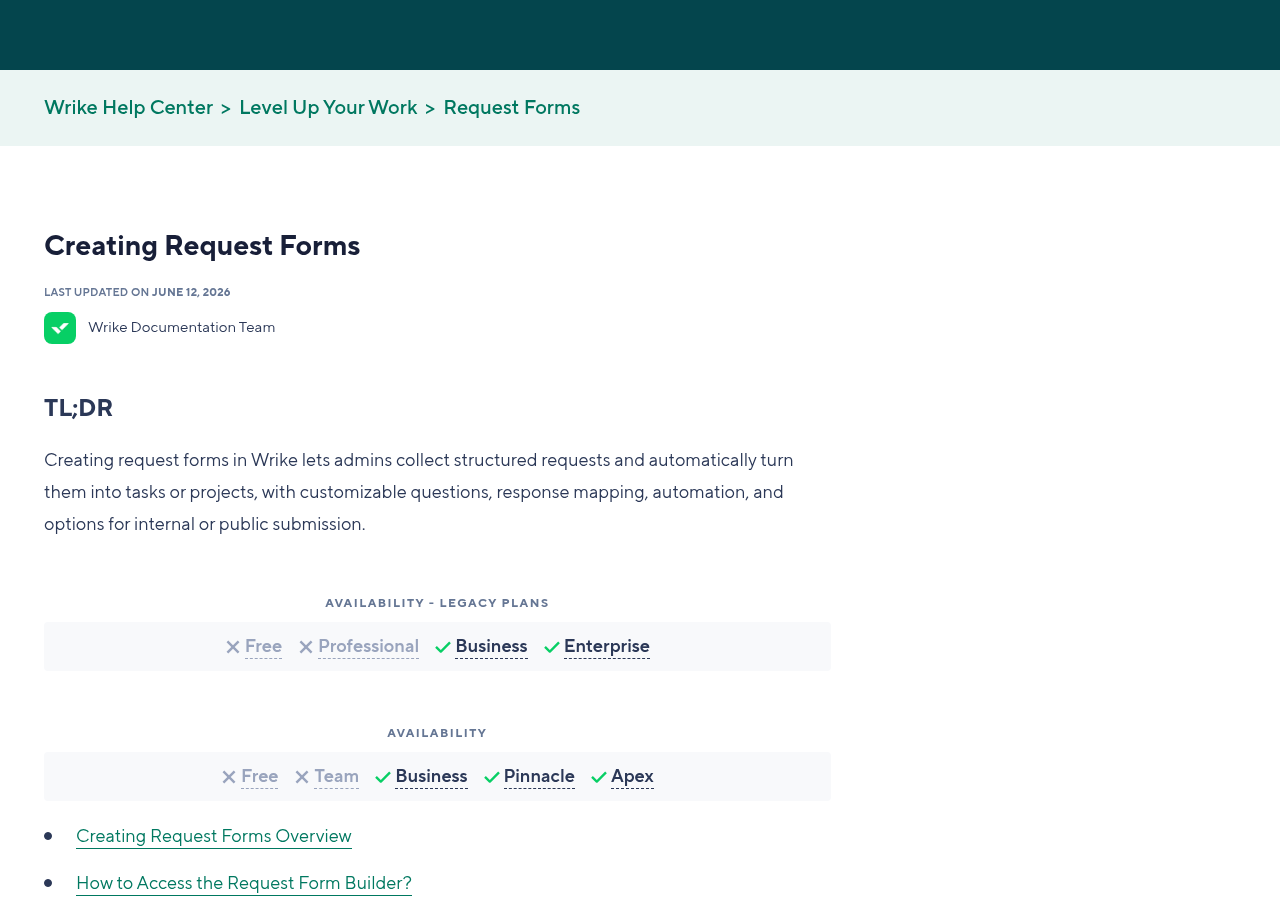
  • Team ($10/user/month, annual, 2–15 users) — basic request forms: static questions, response mapping, task or project creation. Fine for a small team collecting simple work requests.
  • Business ($25/user/month, annual, 5-seat minimum, up to 200 users) — dynamic request forms. This is where conditional follow-up questions, conditional approvals, conditional status changes, conditional subtasks/subprojects, and conditional Blueprint launch live. It’s also the tier with full custom fields and Blueprints, which the best intake setups depend on.
  • Pinnacle and Apex — everything above plus resource planning, budgeting, advanced analytics (Pinnacle) and the integration/AI stack (Apex). You don’t need either tier for forms alone.

My position: if intake is the reason you’re buying Wrike, price the Business plan from day one. A static form on Team saves $15/user/month but forces a human to triage every submission — routing, assigning, and templating by hand. For a 10-person team, that $150/month difference is cheaper than the half-FTE of coordination work it eliminates. Verify current numbers on Wrike’s official pricing page, since the January 2026 rates apply to purchases on or after January 21, 2026.

If you’re comparing intake tooling across platforms before committing, see how Wrike’s forms stack up against Asana’s Forms intake setup and Linear Asks for request intake — the three take meaningfully different approaches to routing and triage.

How to Create Wrike Request Forms Step by Step

Wrike request forms come in two flavors: space-level forms (built by space admins, can only use Blueprints, custom fields, and custom item types from that same space) and account-level forms (built by account admins/owners, can reach across the account). Default to space-level forms — they keep ownership with the team that services the requests and prevent the account-level form list from becoming a junk drawer.

Here’s the full build, per the Wrike Help Center’s Creating Request Forms guide:

  1. Gear icon → Request Forms tab — open the space where requests should land, click the gear icon under the space name to open space settings, select the Request Forms tab, and click + Form. (For an account-level form: profile picture → Settings → Request forms under Account management → + Form.)
  2. Name and describe the form — use the requester’s language, not yours. “Request a Marketing Asset” beats “Creative Intake v3.” The description is your one shot to set expectations: state the SLA (“Requests are triaged within 1 business day”) right here.
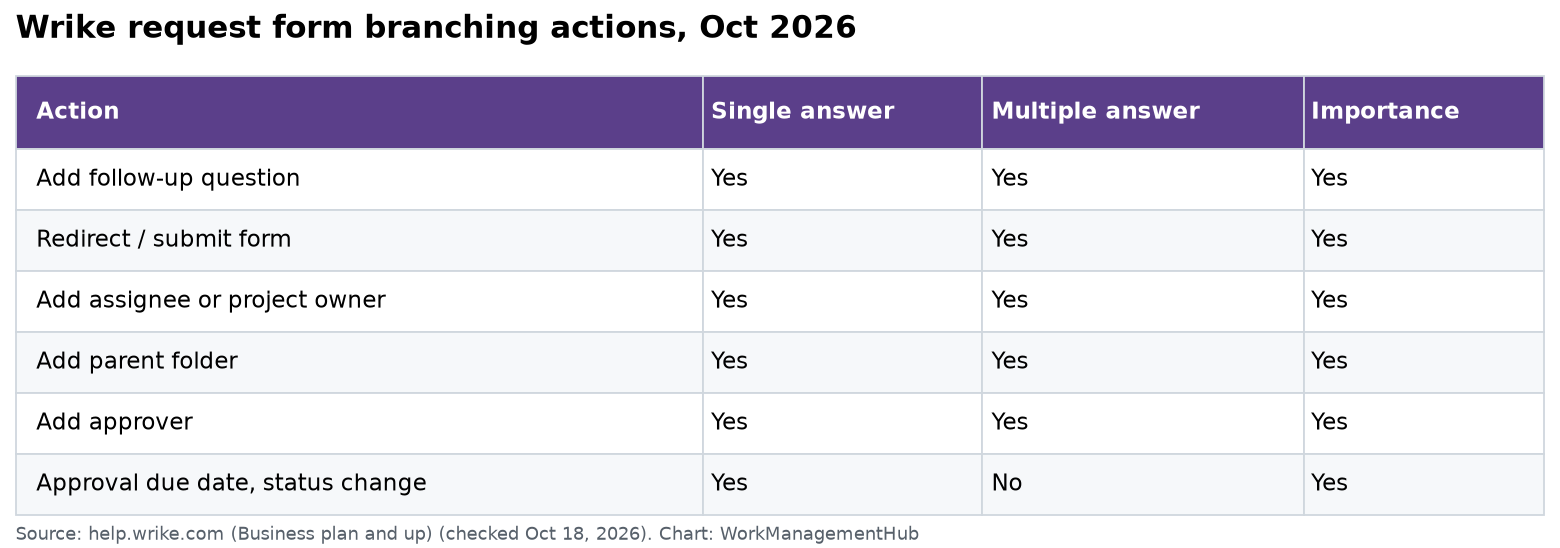
  3. Add questions — click + Add question and choose field types: Short answer, Paragraph, Single answer (dropdown/radio), Multiple answers, Date, Number, Files, Importance, and more. Every question that will drive conditional logic later must be a Single answer, Multiple answers, or Importance type — free-text fields can’t branch.
  4. Map responses to fields — in each question’s settings panel, map the answer to a task/project attribute or custom field (due date question → task due date, budget question → a currency custom field). Unmapped answers just pile up in the description, where nobody can report on them.
  5. Set the result — in the form’s settings, choose whether submissions create a task or a project, pick the destination folder or project, and — critically — select a Blueprint to create the item from, so every submission arrives pre-loaded with your subtasks, assignees, and durations.
  6. Assign default owners and status — set the default assignee (your triage owner) and the workflow status new items should enter with, so submissions never sit ownerless.
  7. Publish and share — save the form, then share it internally or enable the external link so non-Wrike users (clients, other departments) can submit without a license. External forms are the highest-leverage feature here for agencies and shared-services teams.
  8. Submit a test request — fill the form yourself and verify the created item’s location, mapped fields, assignee, and status before announcing it. Every intake failure I’ve debugged traces back to a skipped test.

Wrike can also draft a form for you with AI from a text prompt — useful for a first pass, but review every mapping manually. AI won’t know your custom fields’ reporting purpose.

Adding Dynamic Fields and Conditional Follow-Up Questions

The business case for conditional logic is abandonment. Every irrelevant question on a form costs you completions, and the requests you lose don’t disappear — they come back as untracked side-channel asks. Conditional follow-up questions let a single form feel like a five-question form to everyone, while still collecting twenty fields’ worth of detail across all request types.

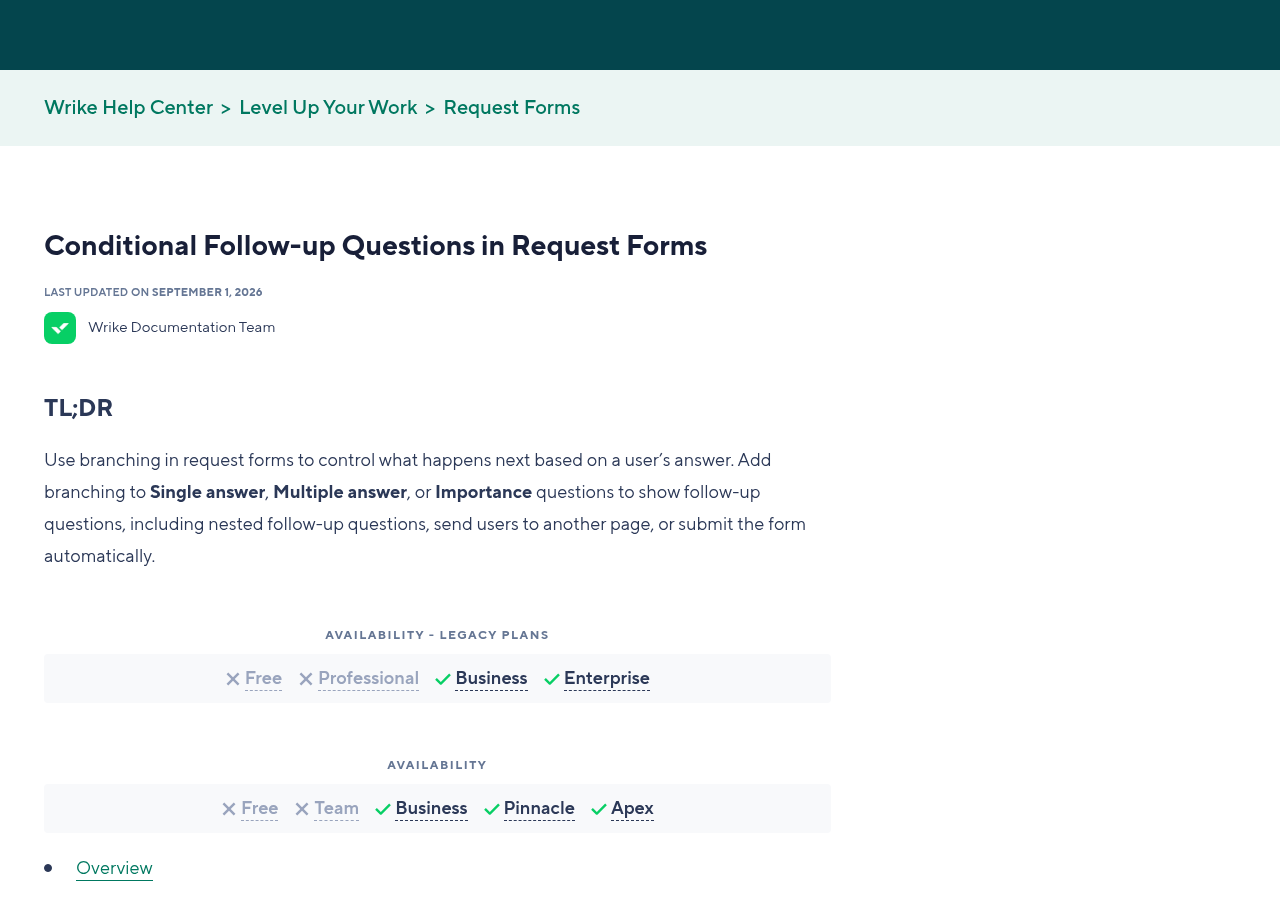
Mechanically, Wrike’s conditional follow-ups work through page redirects: based on the answer selected, the respondent is sent to a specific page of the form. That means your branches live on separate pages, so structure comes first (Business plan or above required):

  1. + Page break — in the form builder, split your form into pages. Page 1 holds the universal questions (requester, request type, deadline); each subsequent page holds the follow-up questions for one branch (e.g., page 2 = design details, page 3 = copywriting details, page 4 = web details).
  2. Select the branching question — click the question that decides the route. It must be a Single answer, Multiple answers, or Importance type; for clean one-path routing, Single answer is the type to use.
  3. Set the redirect per answer — in the question’s settings, assign each answer option its destination: choosing “Design” continues to the design page, “Copywriting” jumps to the copy page, skipping the pages in between.
  4. Route every branch to the end — make sure each branch’s final page continues to the submit step so no path dead-ends into another branch’s questions.
  5. Test every path — submit one test request per answer option. Branch testing is combinatorial; do it before launch, not after the first confused requester emails you.

Design rule I hold clients to: no branch should show a requester more than 8–10 questions total. If a branch needs more, that request type deserves its own dedicated form. Full mechanics are documented in the Dynamic Request Forms article on the Wrike Help Center.

Conditional Blueprint Launch: One Form, Many Workflows

This is the feature that turns a form from a data collector into a routing engine — and the one most fragmented tutorials skip entirely. Conditional launch lets the answer to a Single answer or Importance question determine which task or project gets created. One “Submit a Request” URL can launch your 6-task design Blueprint for design requests, your 15-task campaign project Blueprint for campaign requests, and a simple standalone task for everything else.

The payoff is compounding: requesters memorize one link, and your team never manually converts a generic intake ticket into the right template again. Here’s the setup (Business plan or above):

  1. Build the Blueprints first — create one Blueprint per outcome (in the space’s Blueprints section) with subtasks, default assignees, and durations baked in. For space-level forms, the Blueprints must live in the same space as the form.
  2. Add the routing question — in the form builder, add a Single answer or Importance question whose options correspond one-to-one with your Blueprints (e.g., “What do you need?” → Design asset / Campaign launch / Website change).
  3. Enable conditional launch on the question — open the question’s settings and switch the created-item behavior from the form’s single default to per-answer selection.
  4. Assign a task or project per answer — for each answer option, pick the Blueprint (task or project) that submission should launch, along with its destination location. Different answers can create entirely different item types — a task for one option, a full project for another.
  5. Verify field mapping per branch — mapped answers write onto whichever item gets created, so confirm your mapped custom fields exist on every Blueprint you’re launching into.
  6. Test each answer option end to end — one test submission per option, checking that the right Blueprint spawned in the right folder with dates rescheduled relative to submission.

The exact steps are specified in Wrike’s Conditional Launch of Tasks and Projects documentation. If your team runs sprints, pair this with the workflow patterns in our Wrike agile project management guide — conditionally launched tasks can drop straight into your sprint intake folder.

Conditional Approvals, Status Changes, and Subtasks

Dynamic forms don’t stop at questions and Blueprints. Three more conditional behaviors, all Business-plan features, close the gap between “request received” and “work governed”:

  1. Conditional approvals — configure a Single answer, Multiple answers, or Importance option to trigger an approval process on the created item. The classic pattern: a budget question where “Over $10,000” automatically starts an approval assigned to the department head, while smaller requests flow straight to the team. Nobody polices the threshold; the form does.
  2. Conditional status changes — set specific answers to change the created item’s workflow status. Use this to sort urgent submissions into an “Expedite” status your dashboards filter on, while routine work enters as “New Request.”
  3. Conditional subtasks and subprojects — attach extra subtasks or subprojects when a specific option is selected. Requester ticks “Needs legal review”? A legal-review subtask, pre-assigned to counsel, appends itself to the created task. This is how you make compliance steps impossible to forget — a natural companion to Wrike’s 2026 compliance and data security features for regulated teams.

Configuration for all three follows the same pattern as conditional launch: select the qualifying question in the form builder, open its settings, and attach the approval, status, or subtask behavior to individual answer options. Stack them deliberately — a single “Importance: Critical” selection can simultaneously launch the escalation Blueprint, set an “Expedite” status, and trigger a manager approval.

Custom Field Sync: The Maintenance Work You No Longer Do

Here’s the quiet feature that saves ops teams hours per quarter: when a request form question is mapped to a regular or database custom field, Wrike automatically updates the form’s answer options whenever the field changes. Add a value to the custom field — it appears on the form. Rename, reorder, or delete values — the form syncs, automatically.

Why this matters in practice: intake forms rot. The “Product Line” dropdown that was accurate at launch is missing two SKUs by Q3, and requesters start choosing “Other,” which destroys your reporting. With field-synced questions, the person who maintains the custom field is maintaining the form, with zero extra process. My rule: any dropdown whose options change more than once a year — teams, products, clients, cost centers — should be a mapped custom field, never a hand-typed answer list.

Two cautions. First, deletions sync too: removing a custom field value removes the form option, so audit dependent conditional logic before pruning field values. Second, conditional redirects and launches hang off specific answer options — if a synced rename or deletion touches an option that drives branching, retest that branch immediately.

Five Wrike Request Forms Mistakes That Break Intake

Patterns I see repeatedly in intake audits:

  1. Building on the wrong plan — teams design a branching form on paper, then discover conditional logic is Business-tier ($25/user/month, 5-seat minimum). Confirm your tier before you design, not after.
  2. Free-text where a Single answer belongs — only Single answer, Multiple answers, and Importance questions can drive conditions. A “What type of request?” paragraph field is a routing dead end and a reporting black hole.
  3. Skipping the Blueprint — forms that create bare tasks just relocate the triage work. If your team does the same setup steps for every request of a given type, that’s a Blueprint, and the form should launch it.
  4. Untested branches — every answer option is a code path. One redirect pointing at the wrong page silently sends web requests to the print-questions page, and you find out from an angry requester a week later.
  5. No external link for outside requesters — if clients or other departments can’t submit without a Wrike seat, they’ll email instead, and your beautiful form collects dust. Enable the external form link whenever requesters live outside your account.
🏆 Verdict

Wrike’s dynamic request forms are the strongest native intake system in the mainstream work-management market in 2026 — conditional Blueprint launch, in particular, has no true equivalent in Asana’s Forms, and custom-field sync eliminates the option-rot that plagues every other tool’s dropdowns. But the value is squarely gated to the Business plan: on Team, you get a static form that still needs a human router. My recommendation is unambiguous — if structured intake is a core requirement, buy Business ($25/user/month, 5-seat minimum), build space-level forms mapped to synced custom fields, and route everything through conditional Blueprint launch. If you only need a simple suggestion box, Team suffices — but don’t buy Wrike primarily for that.

Frequently Asked Questions

Which Wrike plan do I need for dynamic request forms in 2026?

Dynamic request forms — conditional follow-up questions, conditional approvals, conditional status changes, conditional subtasks, and conditional Blueprint launch — require the Business plan at $25/user/month (annual billing, 5-seat minimum). Under Wrike’s January 2026 restructure the tiers are Free, Team, Business, Pinnacle, and Apex; basic static forms are available on Team, and the old Enterprise plan no longer exists for new customers.

Can Wrike request forms launch different projects based on an answer?

Yes. Conditional launch lets a Single answer or Importance question determine which task or project a submission creates, including launching entirely different Blueprints per answer option. One form can create a simple task for routine requests and a full multi-phase project for complex ones, each landing in its own destination folder.

Can people without a Wrike account submit a request form?

Yes. Enabling the external form link produces a public URL that non-Wrike users — clients, vendors, other departments — can use to submit requests without a license. Submissions still create tasks or projects inside your account with full field mapping, which makes external forms the standard pattern for agency and shared-services intake.

Do request form dropdowns update when I change a custom field?

Automatically, yes — for questions mapped to regular or database custom fields. When you add, rename, reorder, or delete values on the custom field, Wrike syncs the corresponding form options without any manual edit. Just retest your conditional branches after changing options that drive redirects or conditional launches, since those conditions attach to specific answers.

What’s the difference between space-level and account-level request forms?

Space-level forms are created by space admins from the space’s gear icon → Request Forms tab, and can only use Blueprints, custom fields, and custom item types from that same space. Account-level forms are created by account admins under Settings → Account management → Request forms and can reach across the account. Default to space-level forms so the team that services the requests owns the form.

Author

Khasim

Khasim is a work management expert and entrepreneur with a deep passion for project management tools. He works hands-on with platforms like Smartsheet, Monday.com, Asana, ClickUp, Jira, Notion, Wrike and Airtable every day, and loves automating workflows to save teams and customers a ton of time. On WorkManagementHub he shares practical setup guides, honest tool comparisons, and real-world troubleshooting drawn from daily use.

Follow Me
Other Articles
Previous

Smartsheet Notifications Not Working? 8 Fixes for Alerts, Reminders & Approval Emails in 2026

Next

How to Set Up Asana My Tasks in 2026

No Comment! Be the first one.

    Leave a Reply Cancel reply

    Your email address will not be published. Required fields are marked *

    Sponsored Smartsheet Expert Services – Implementation, Automation, Training
    Sponsored Power BI & Tableau Analytics – Dashboards, Reporting, Insights
    Sponsored AI Agents for Work Management – Automate Tasks, Integrate Tools

    Categories

    • Airtable (21)
    • Alternatives (12)
    • Asana (41)
    • ClickUp (47)
    • How-To Guides (192)
    • Integrations (17)
    • Jira (36)
    • Monday.com (46)
    • Notion (35)
    • Pricing Guides (11)
    • Project Management (80)
    • Smartsheet (39)
    • Tool Comparisons (59)
    • Wrike (19)

    Recent Post

    • How to Customize Jira Workflows for Non-Technical Teams in 2026: A Comprehensive Guide
    • Notion vs Airtable for Academic Research in 2026: Which Tool Wins?
    • How to Use Smartsheet for Event Planning in 2026: Complete Setup Guide
    • Airtable vs Trello 2026: Which Tool Enhances Cross-Team Collaboration Better?
    • How to Leverage Smartsheet for Strategic HR Planning in 2026: Workforce Analytics, Succession Planning & More

    Independent reviews, comparisons, and hands-on guides for work management tools — Smartsheet, Monday.com, Asana, ClickUp, Notion, Jira, Wrike, and Airtable — written from daily, real-world use of these platforms.

    Tools We Cover

    • Smartsheet
    • Monday.com
    • ClickUp
    • Asana
    • Notion
    • Jira
    • Wrike
    • Airtable

    Company

    • About Us
    • Contact Us
    • Privacy Policy
    Copyright 2026 — Work Management Hub. All rights reserved. Blogsy WordPress Theme